Single Sign-On (SSO): Integrating with Microsoft Entra ID
- Microsoft Entra ID setup
- Enabling Single sign-on in Managed Studio
- Signing in with Single sign-on
- Accepting invitations with Single sign-on
Microsoft Entra ID is the new name for Azure AD (Azure Active Directory).
Microsoft Entra ID setup
Requirements
- You will need to use an Entra ID users with sufficient administrative privileges
- The Managed Studio application will require the GroupMember.Read.All permission for the Graph API in order to be able to support group-based access granting for machine pools
- A client secret needs to be generated in Entra ID and provided for authenticating these API calls
Setup instructions
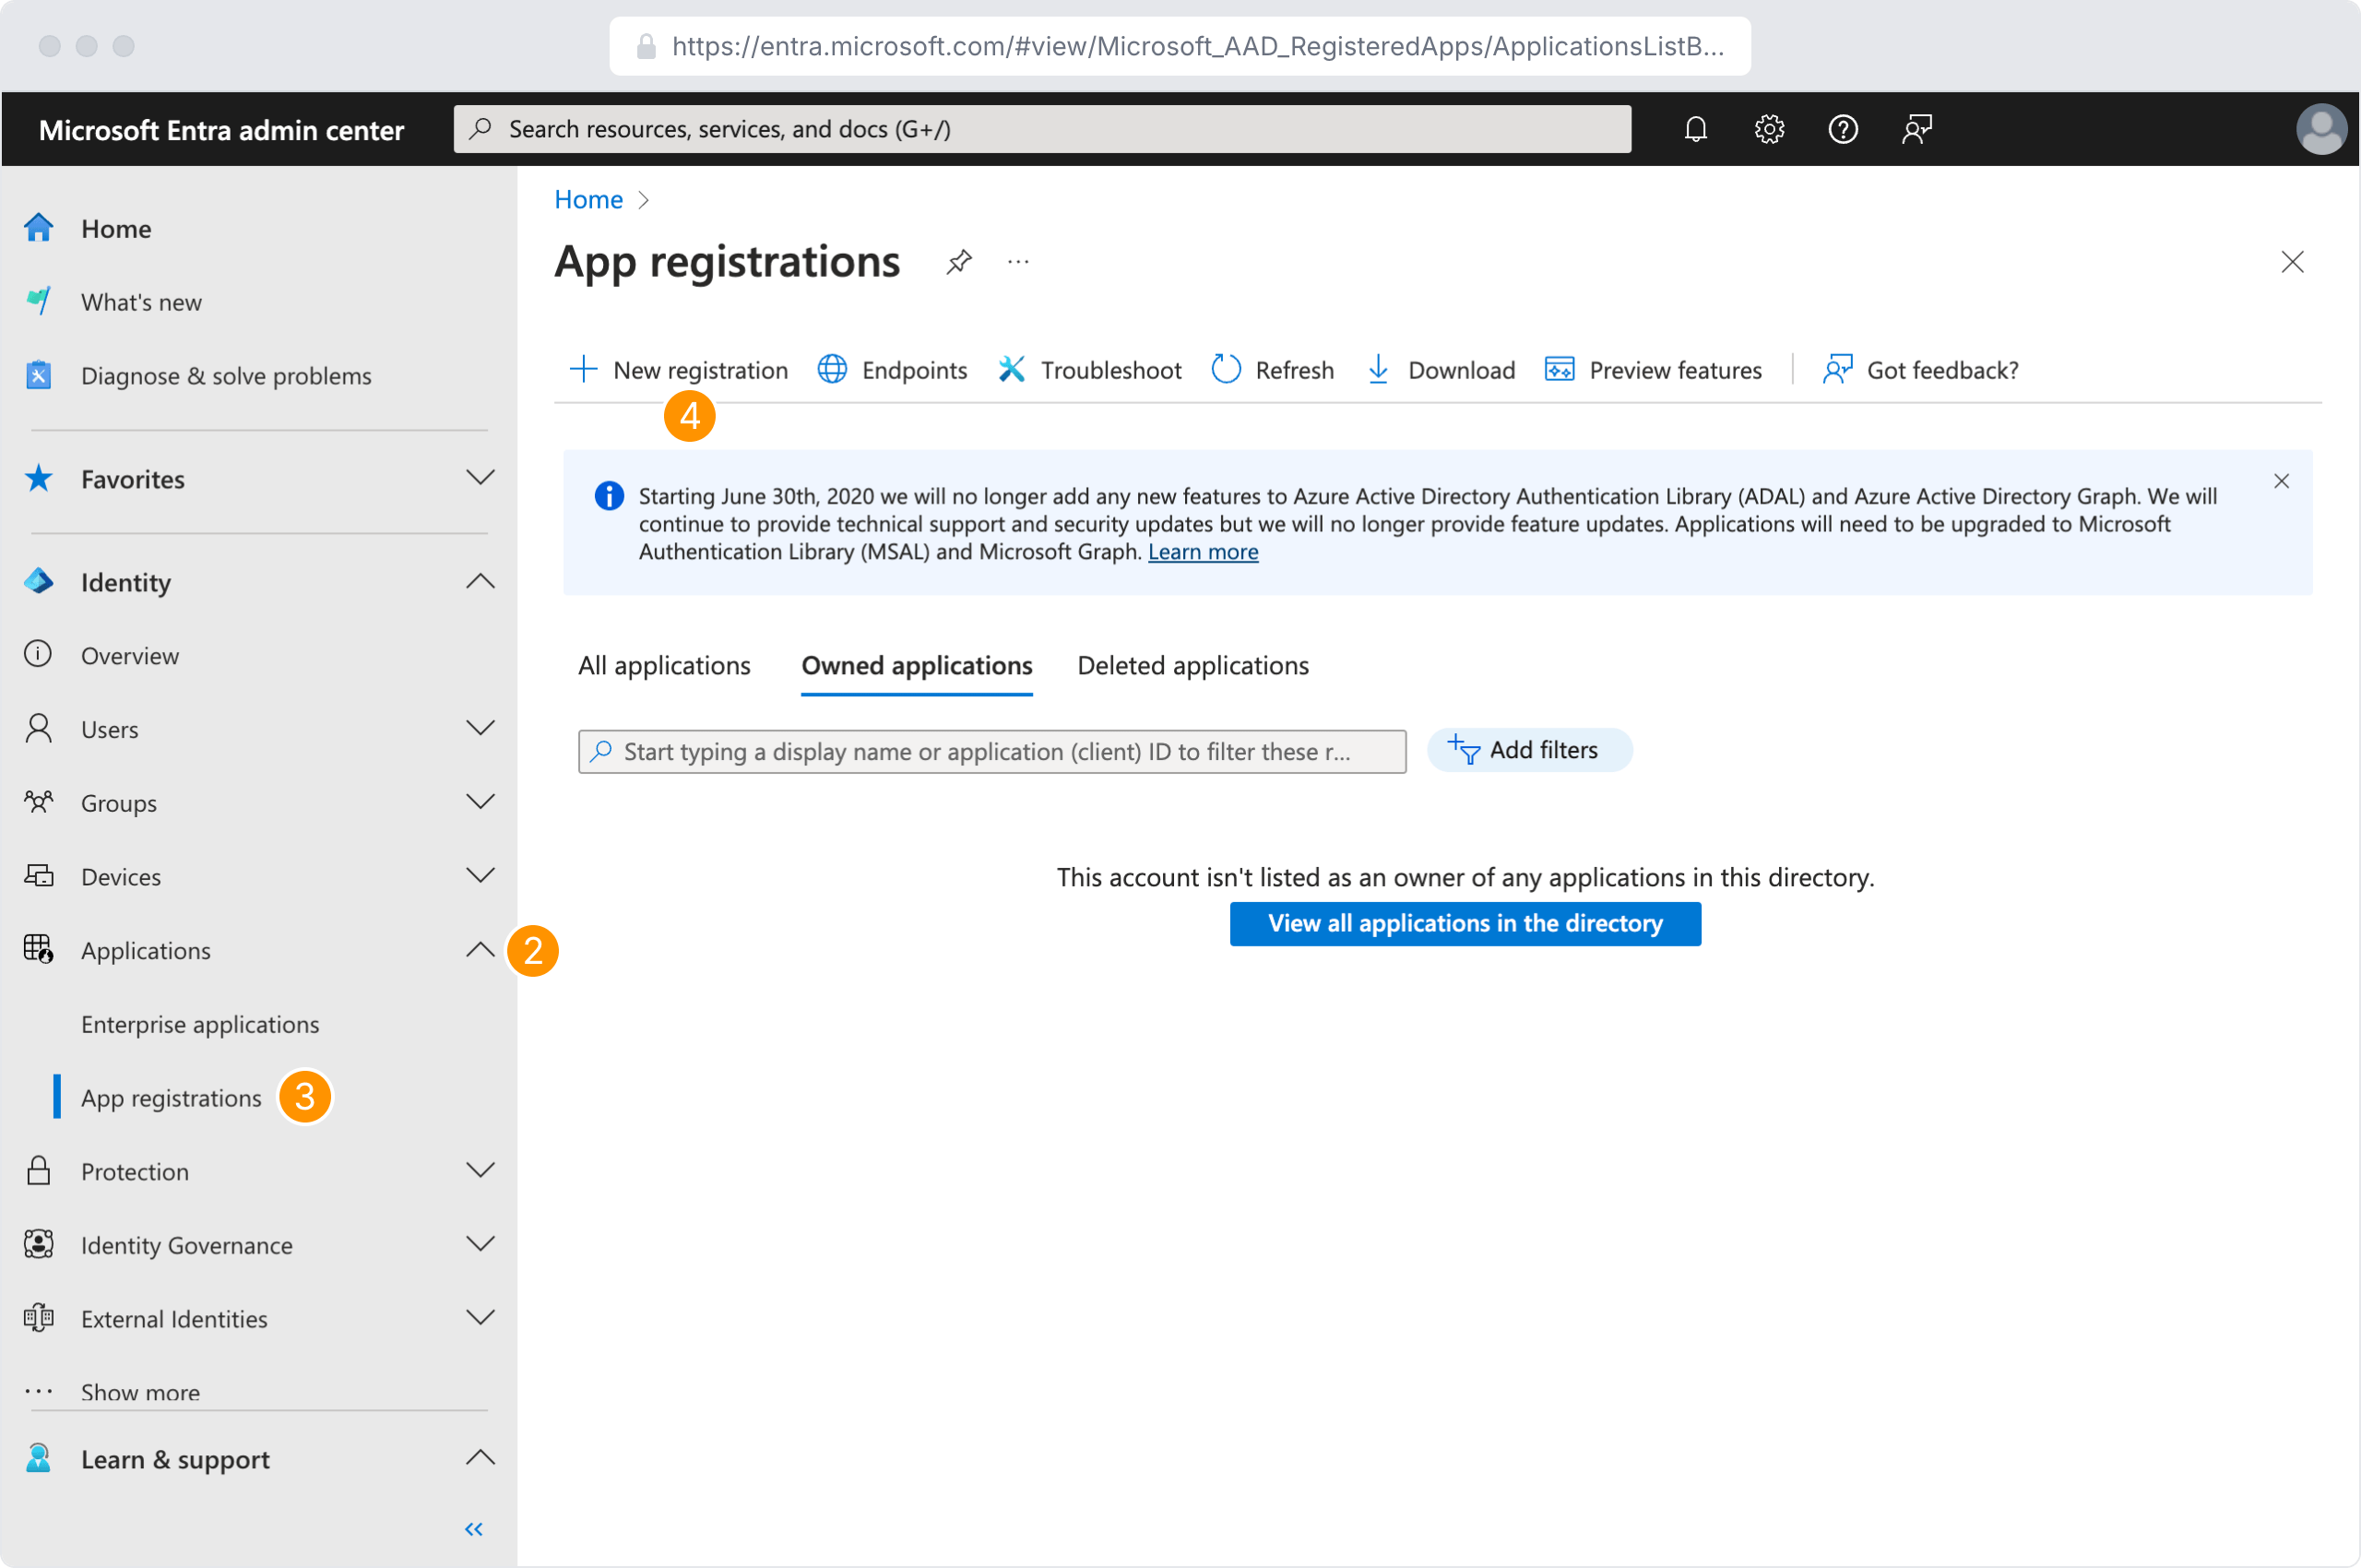
- Sign in to the Microsoft Entra admin center
- In the left navigation bar, click Applications
- Click App Registrations
- Click New Registration to register a new application
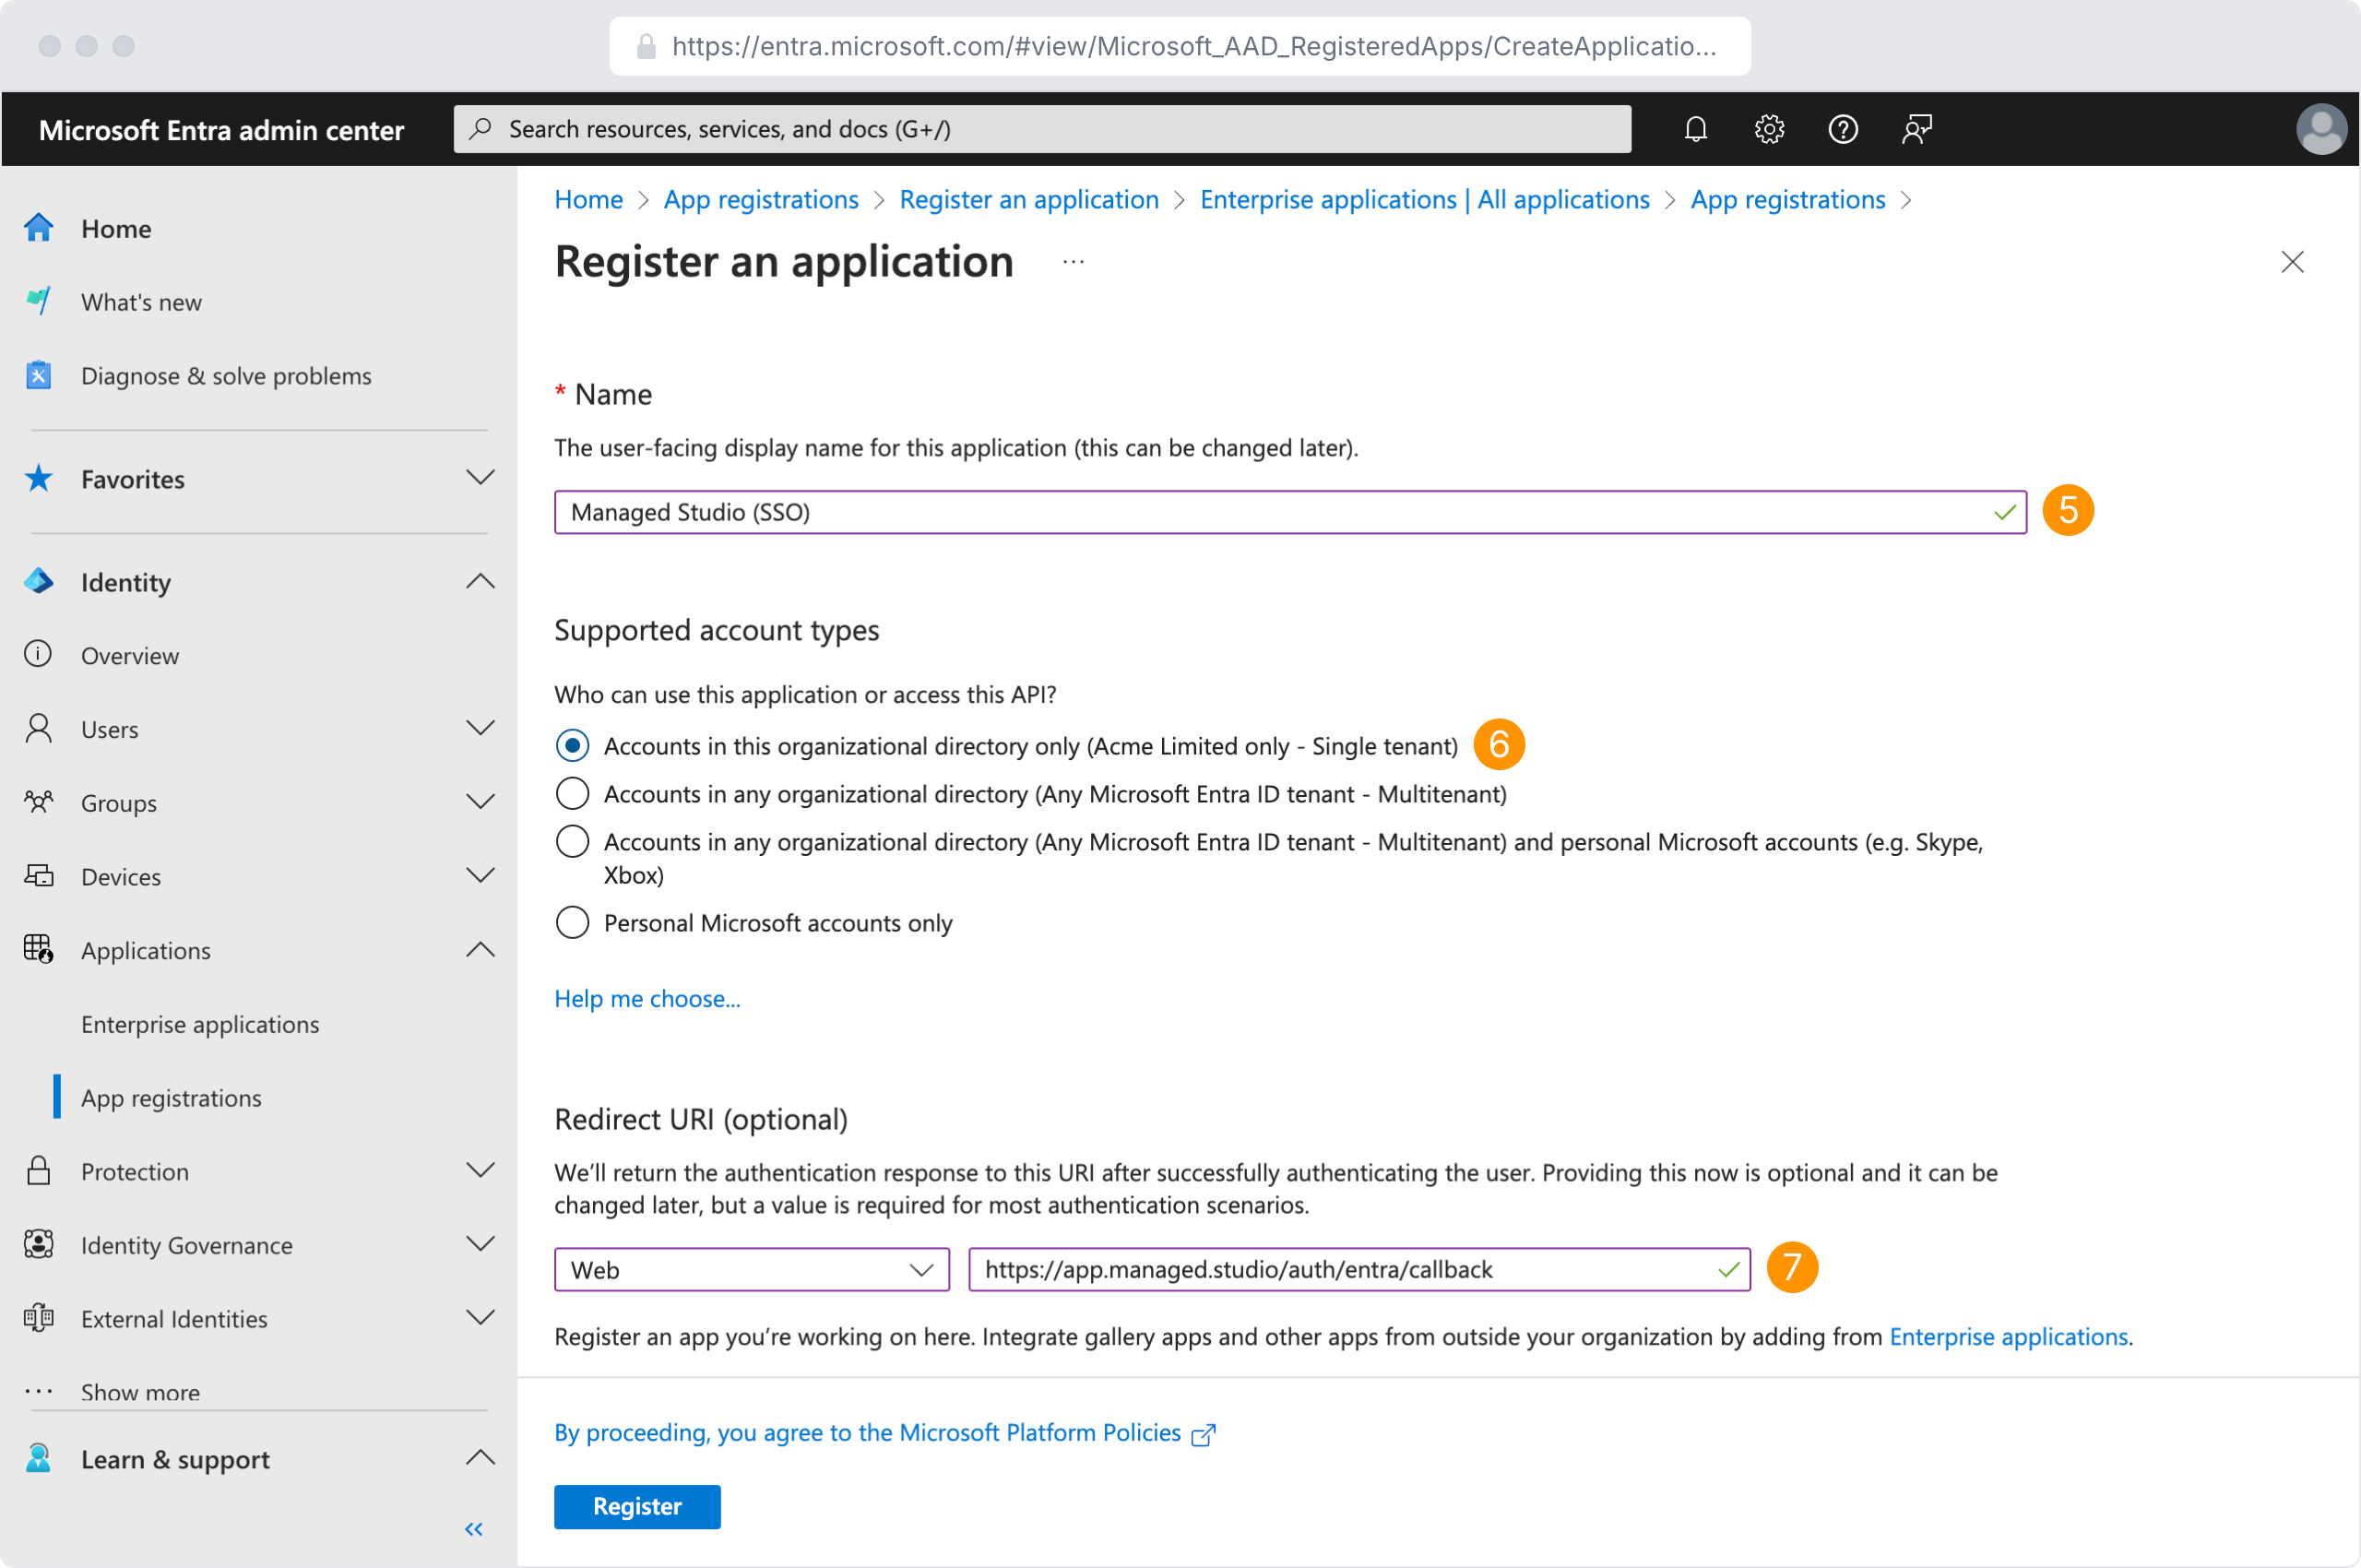
- In the Name field, specify a name for the application (such as "Managed Studio SSO")
- For Supported account types select Accounts in this organizational directory only
- In the Redirect URI field, select Web from the dropdown menu, and enter:
https://app.managed.studio/auth/entra/callback
- Click Register
- On the new page, copy the Application (client) ID and save this for later
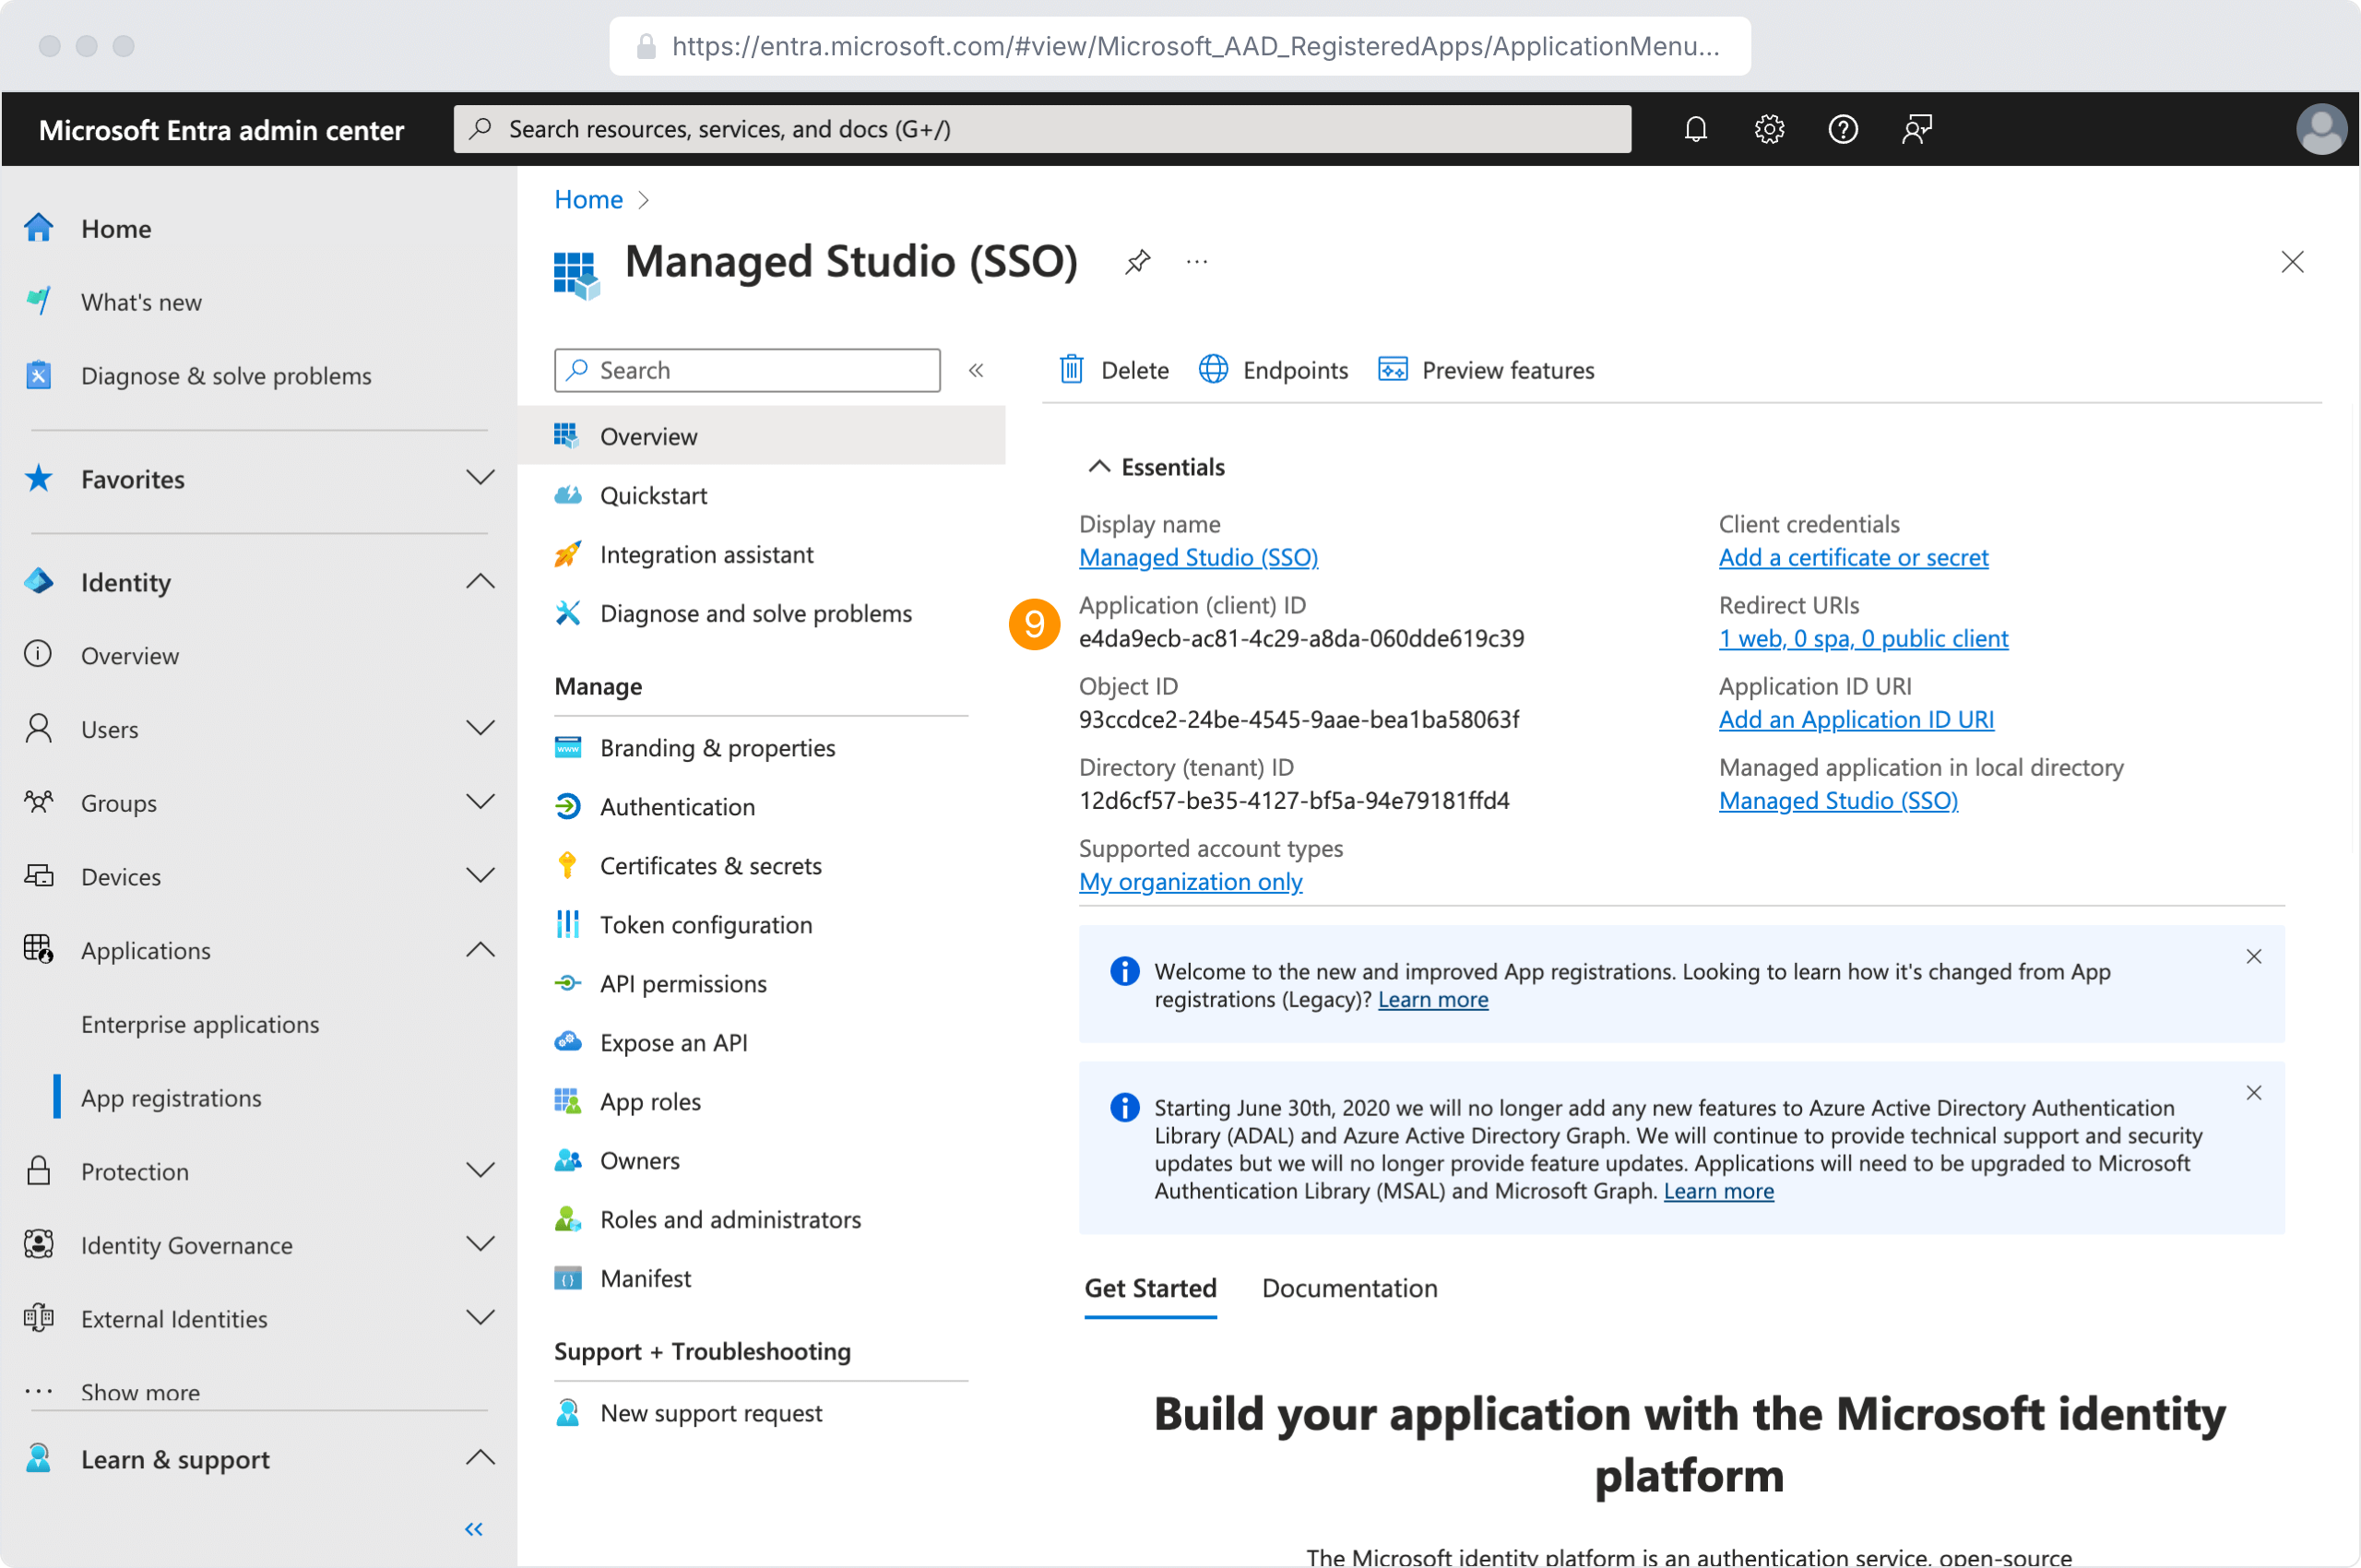
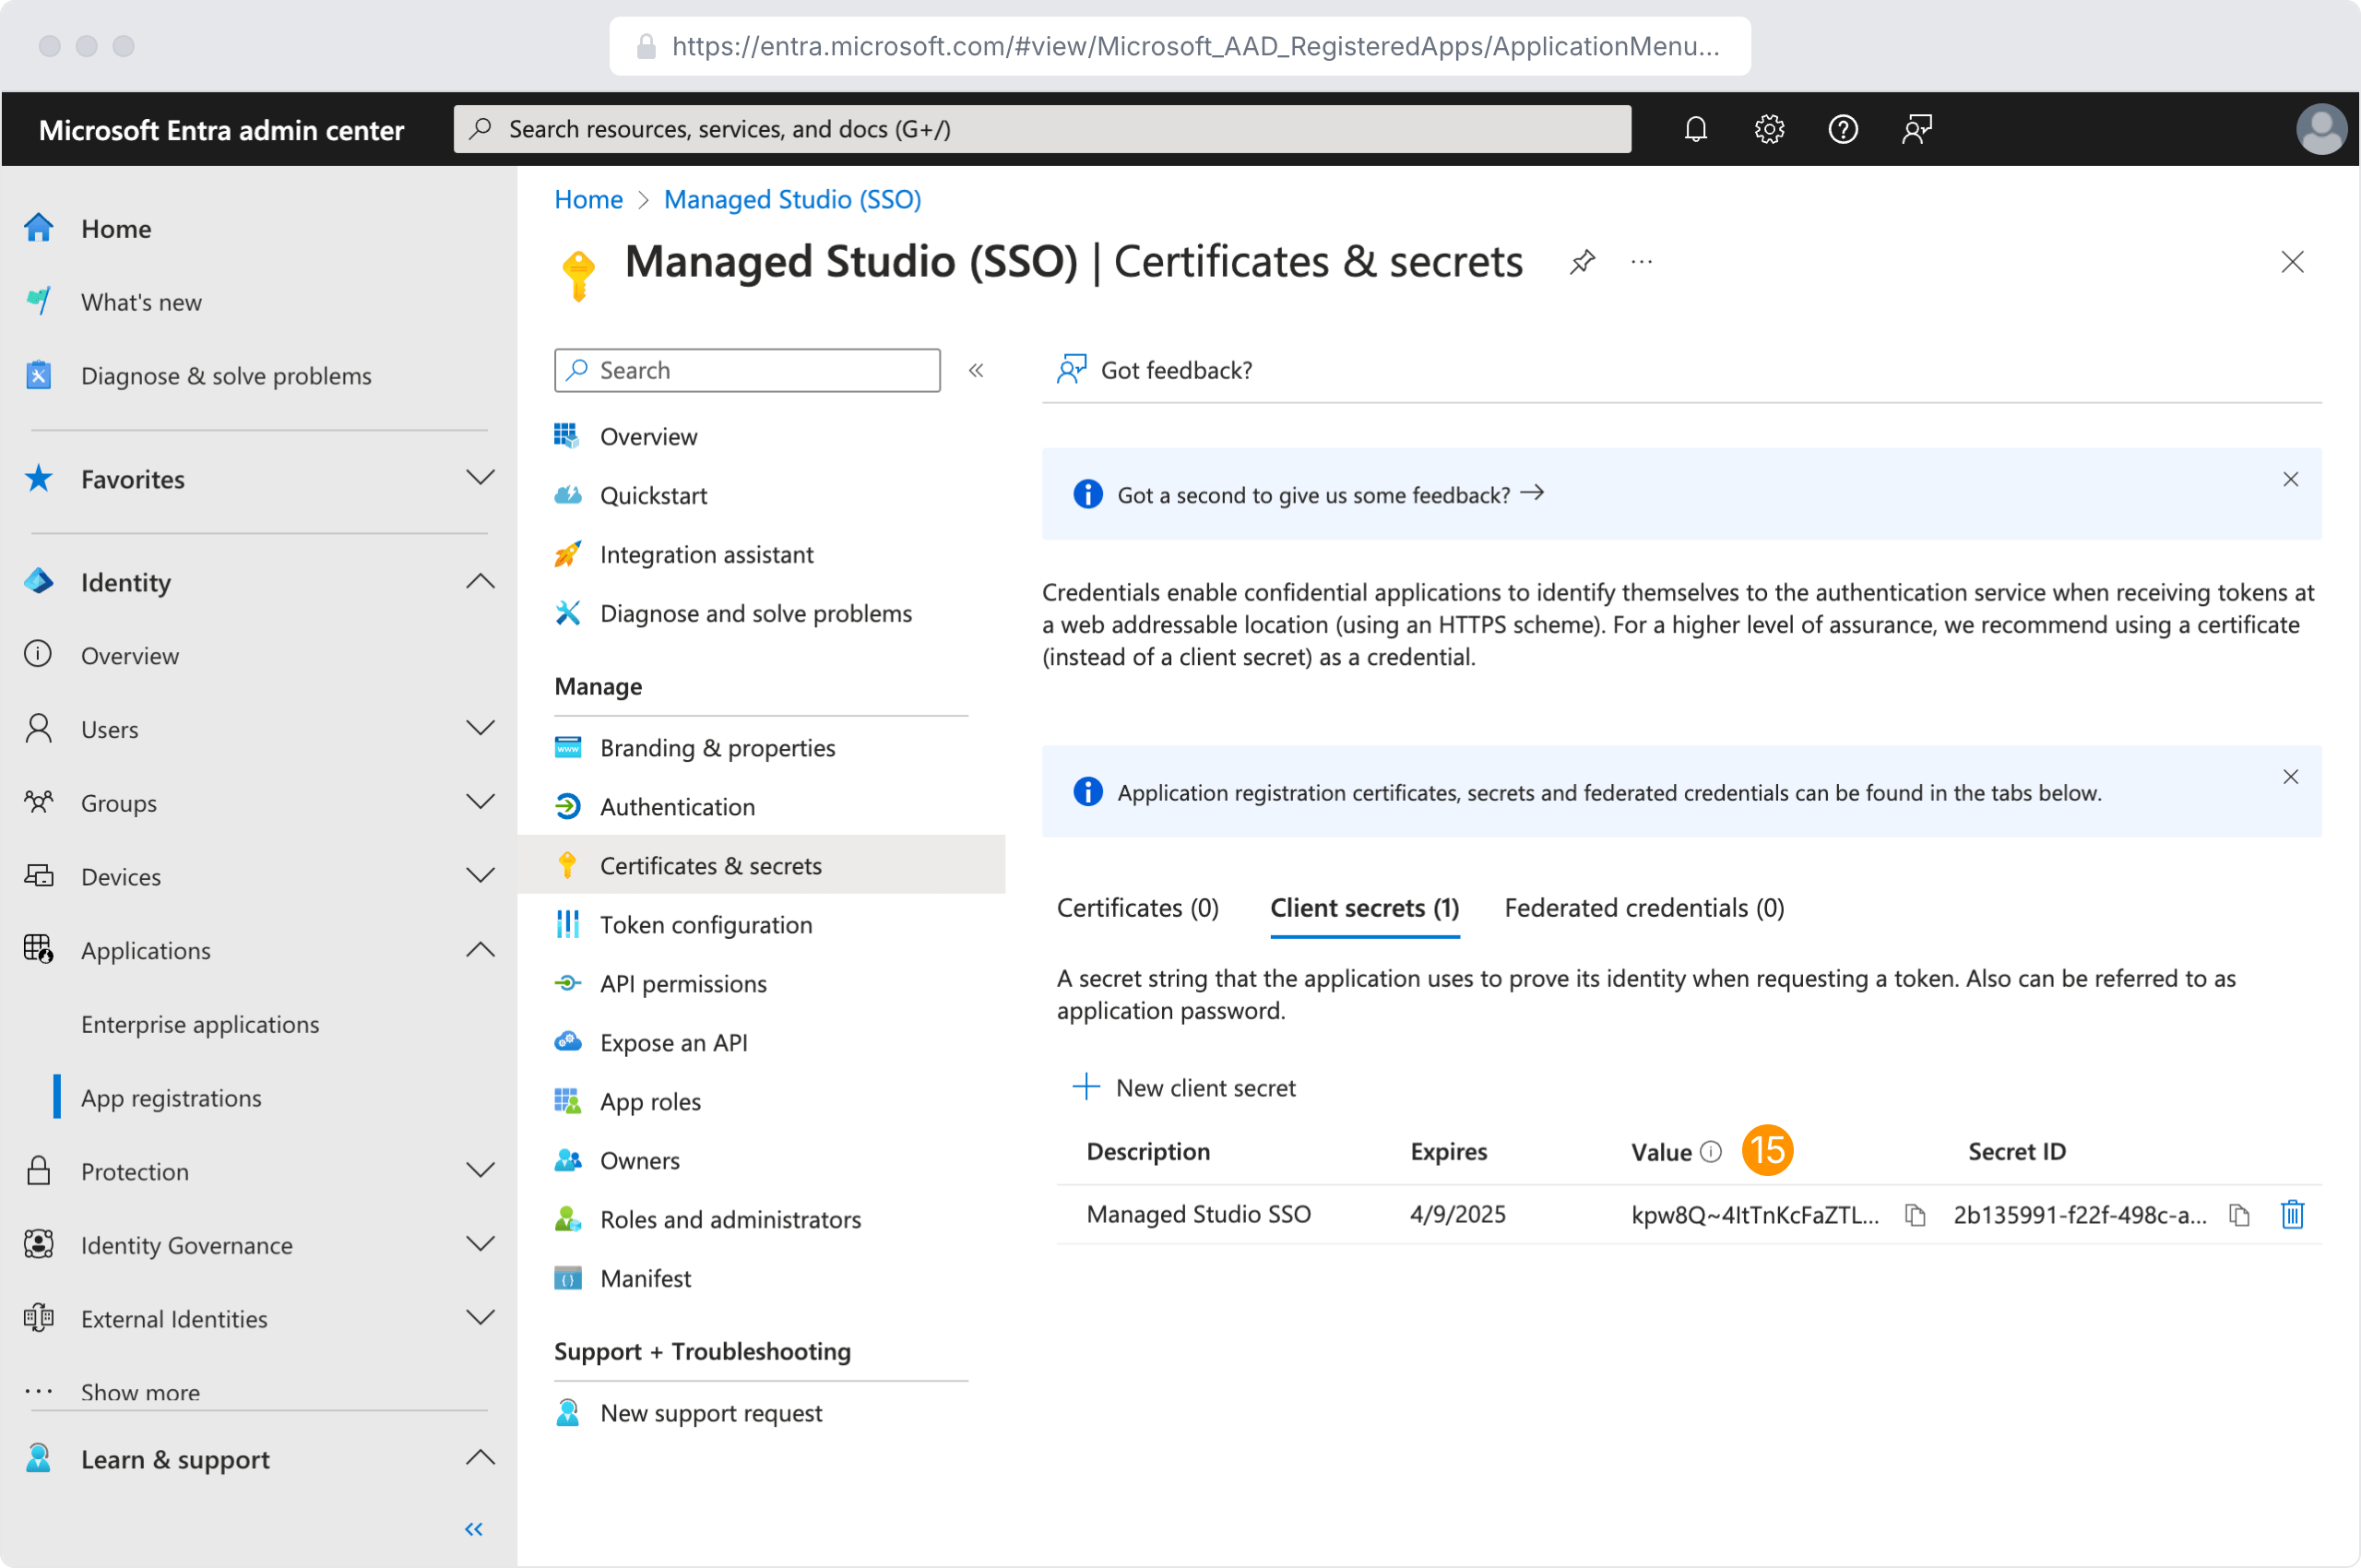
- Navigate to the Certificates and Secrets menu item
- Click New client secret
- Give the client secret a Description (such as "Managed Studio SSO")
- Set the expiration to 24 months
- Click Add
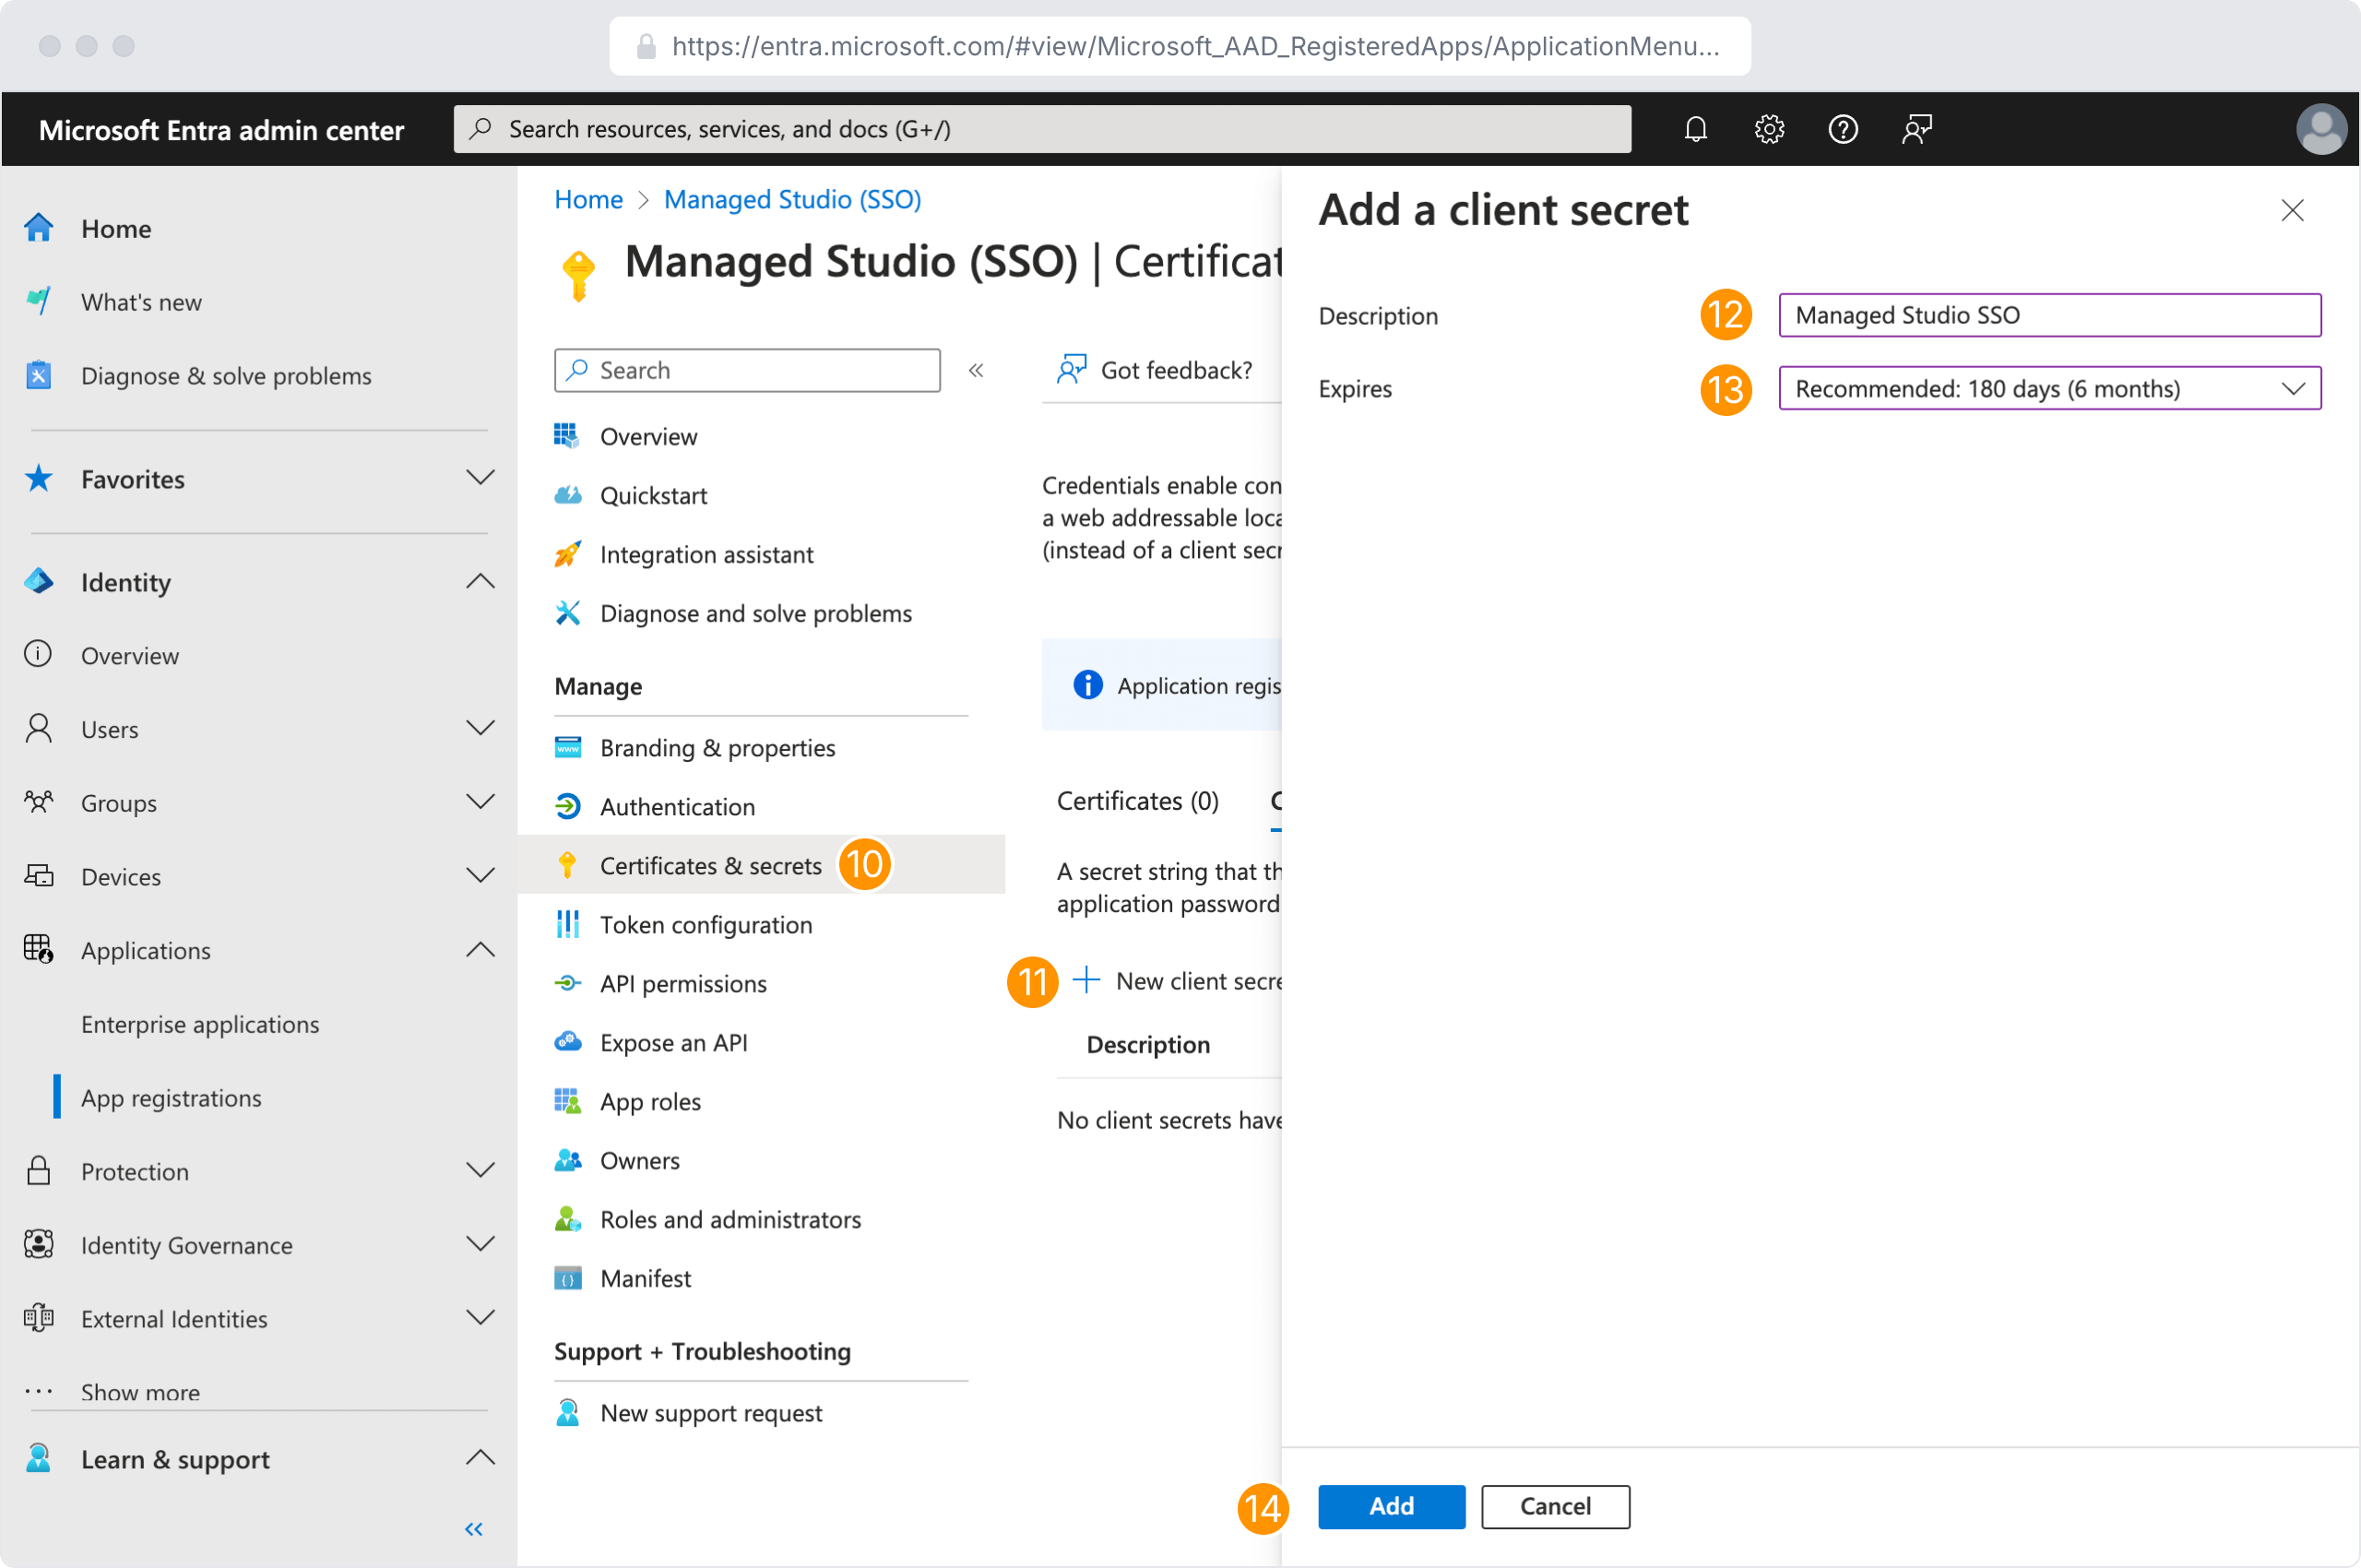
- Copy the Value of the client secret and save this for later. Note that the client secret Value is distinct from the client secret ID
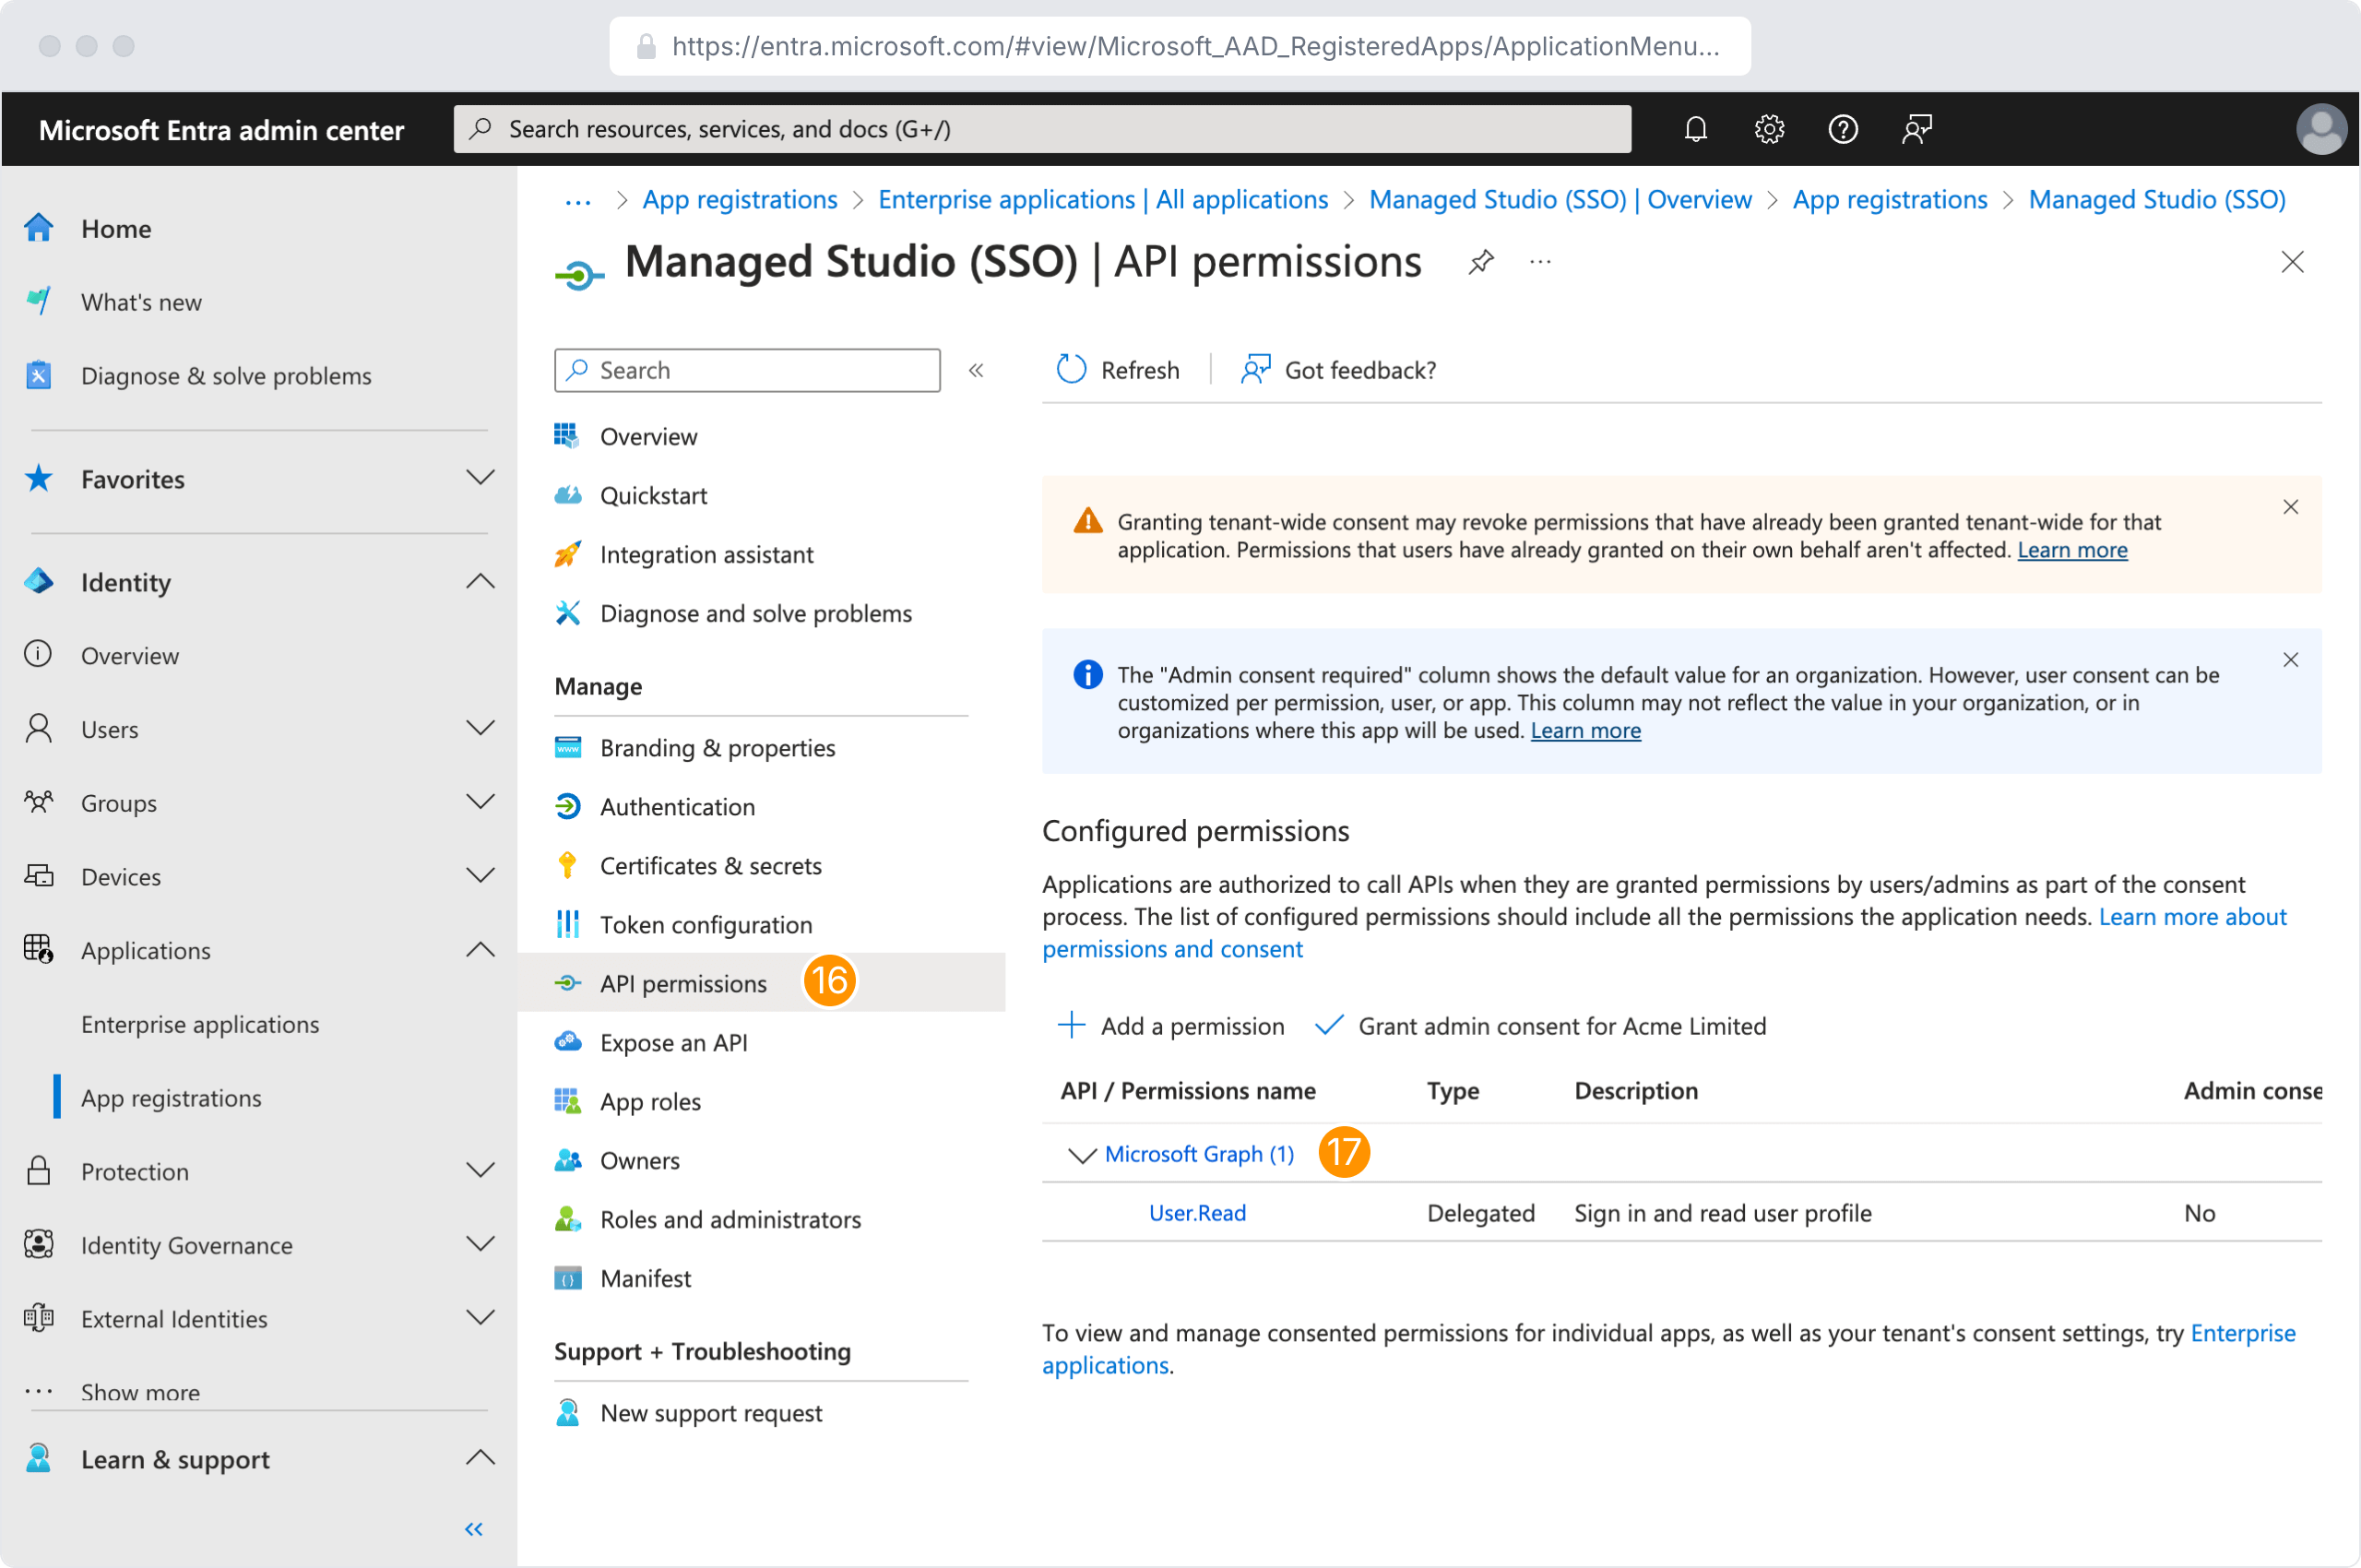
- Navigate to the API permissions menu item
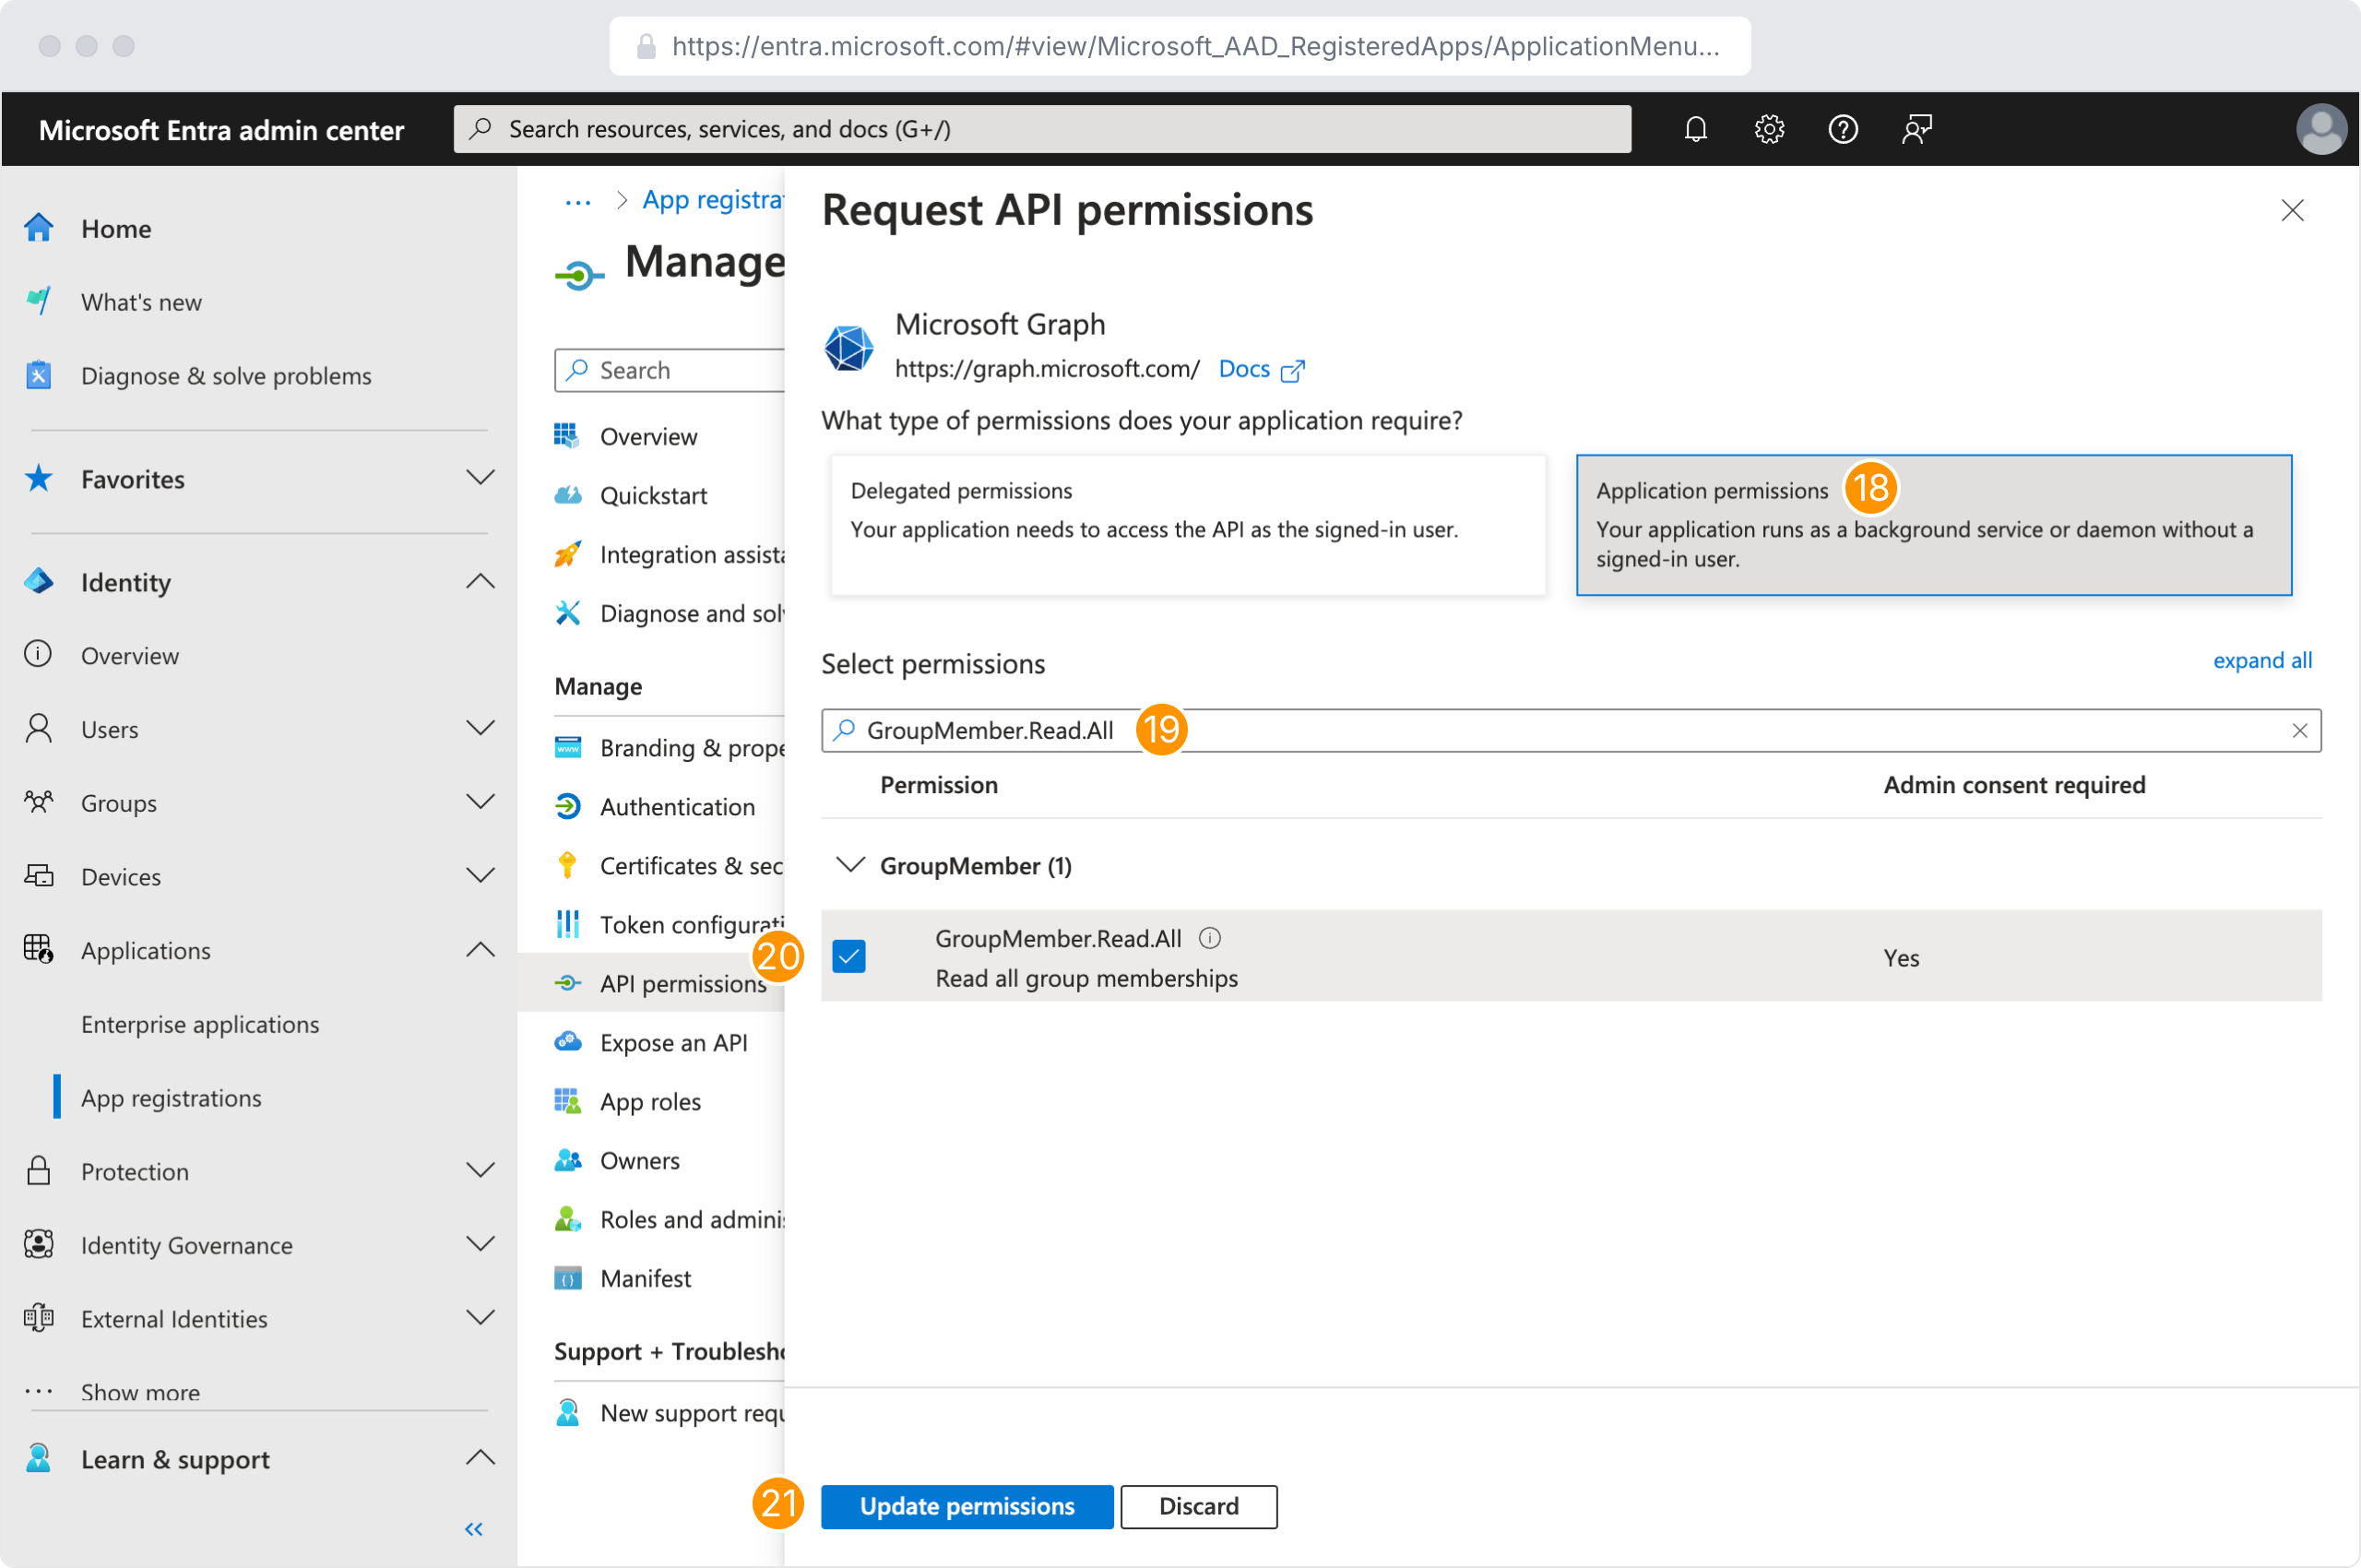
- Click Microsoft Graph
- Click Application permissions
- Search for GroupMember.Read.All
- Select GroupMember.Read.All
- Click Update permissions
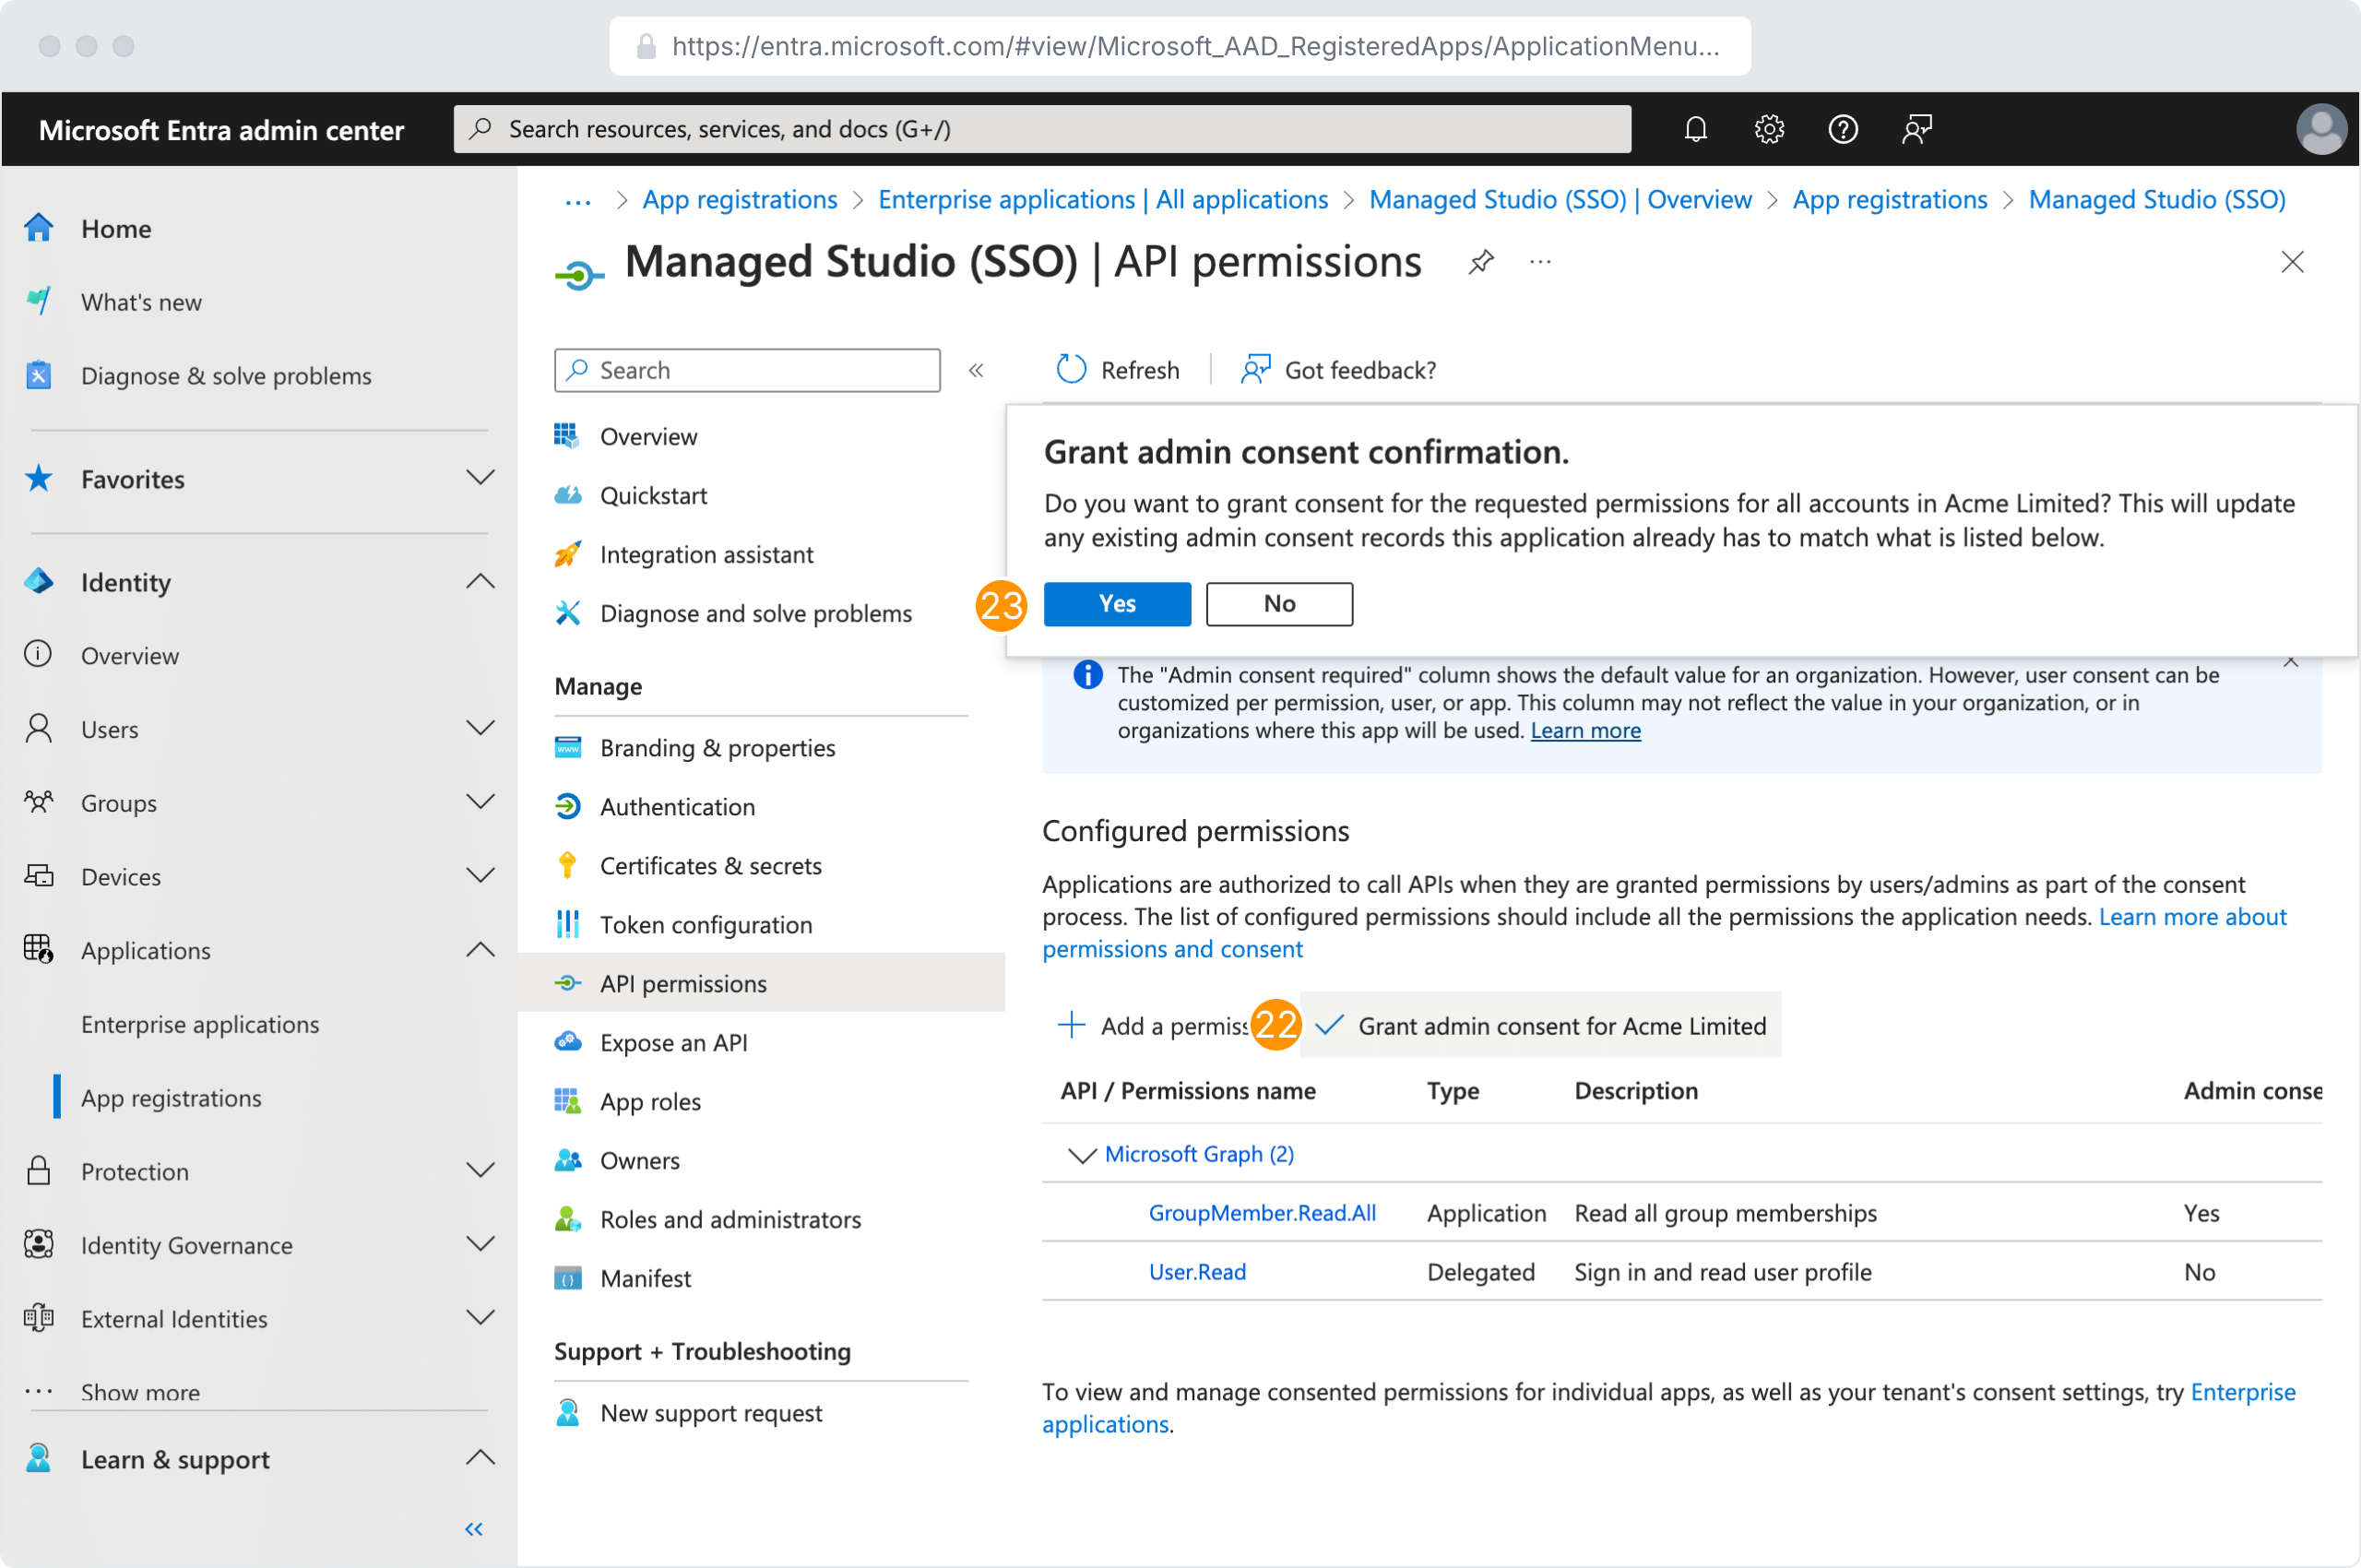
- Back on the permissions list, click Grant Admin Consent for [your Directory’s name]
- Click Yes
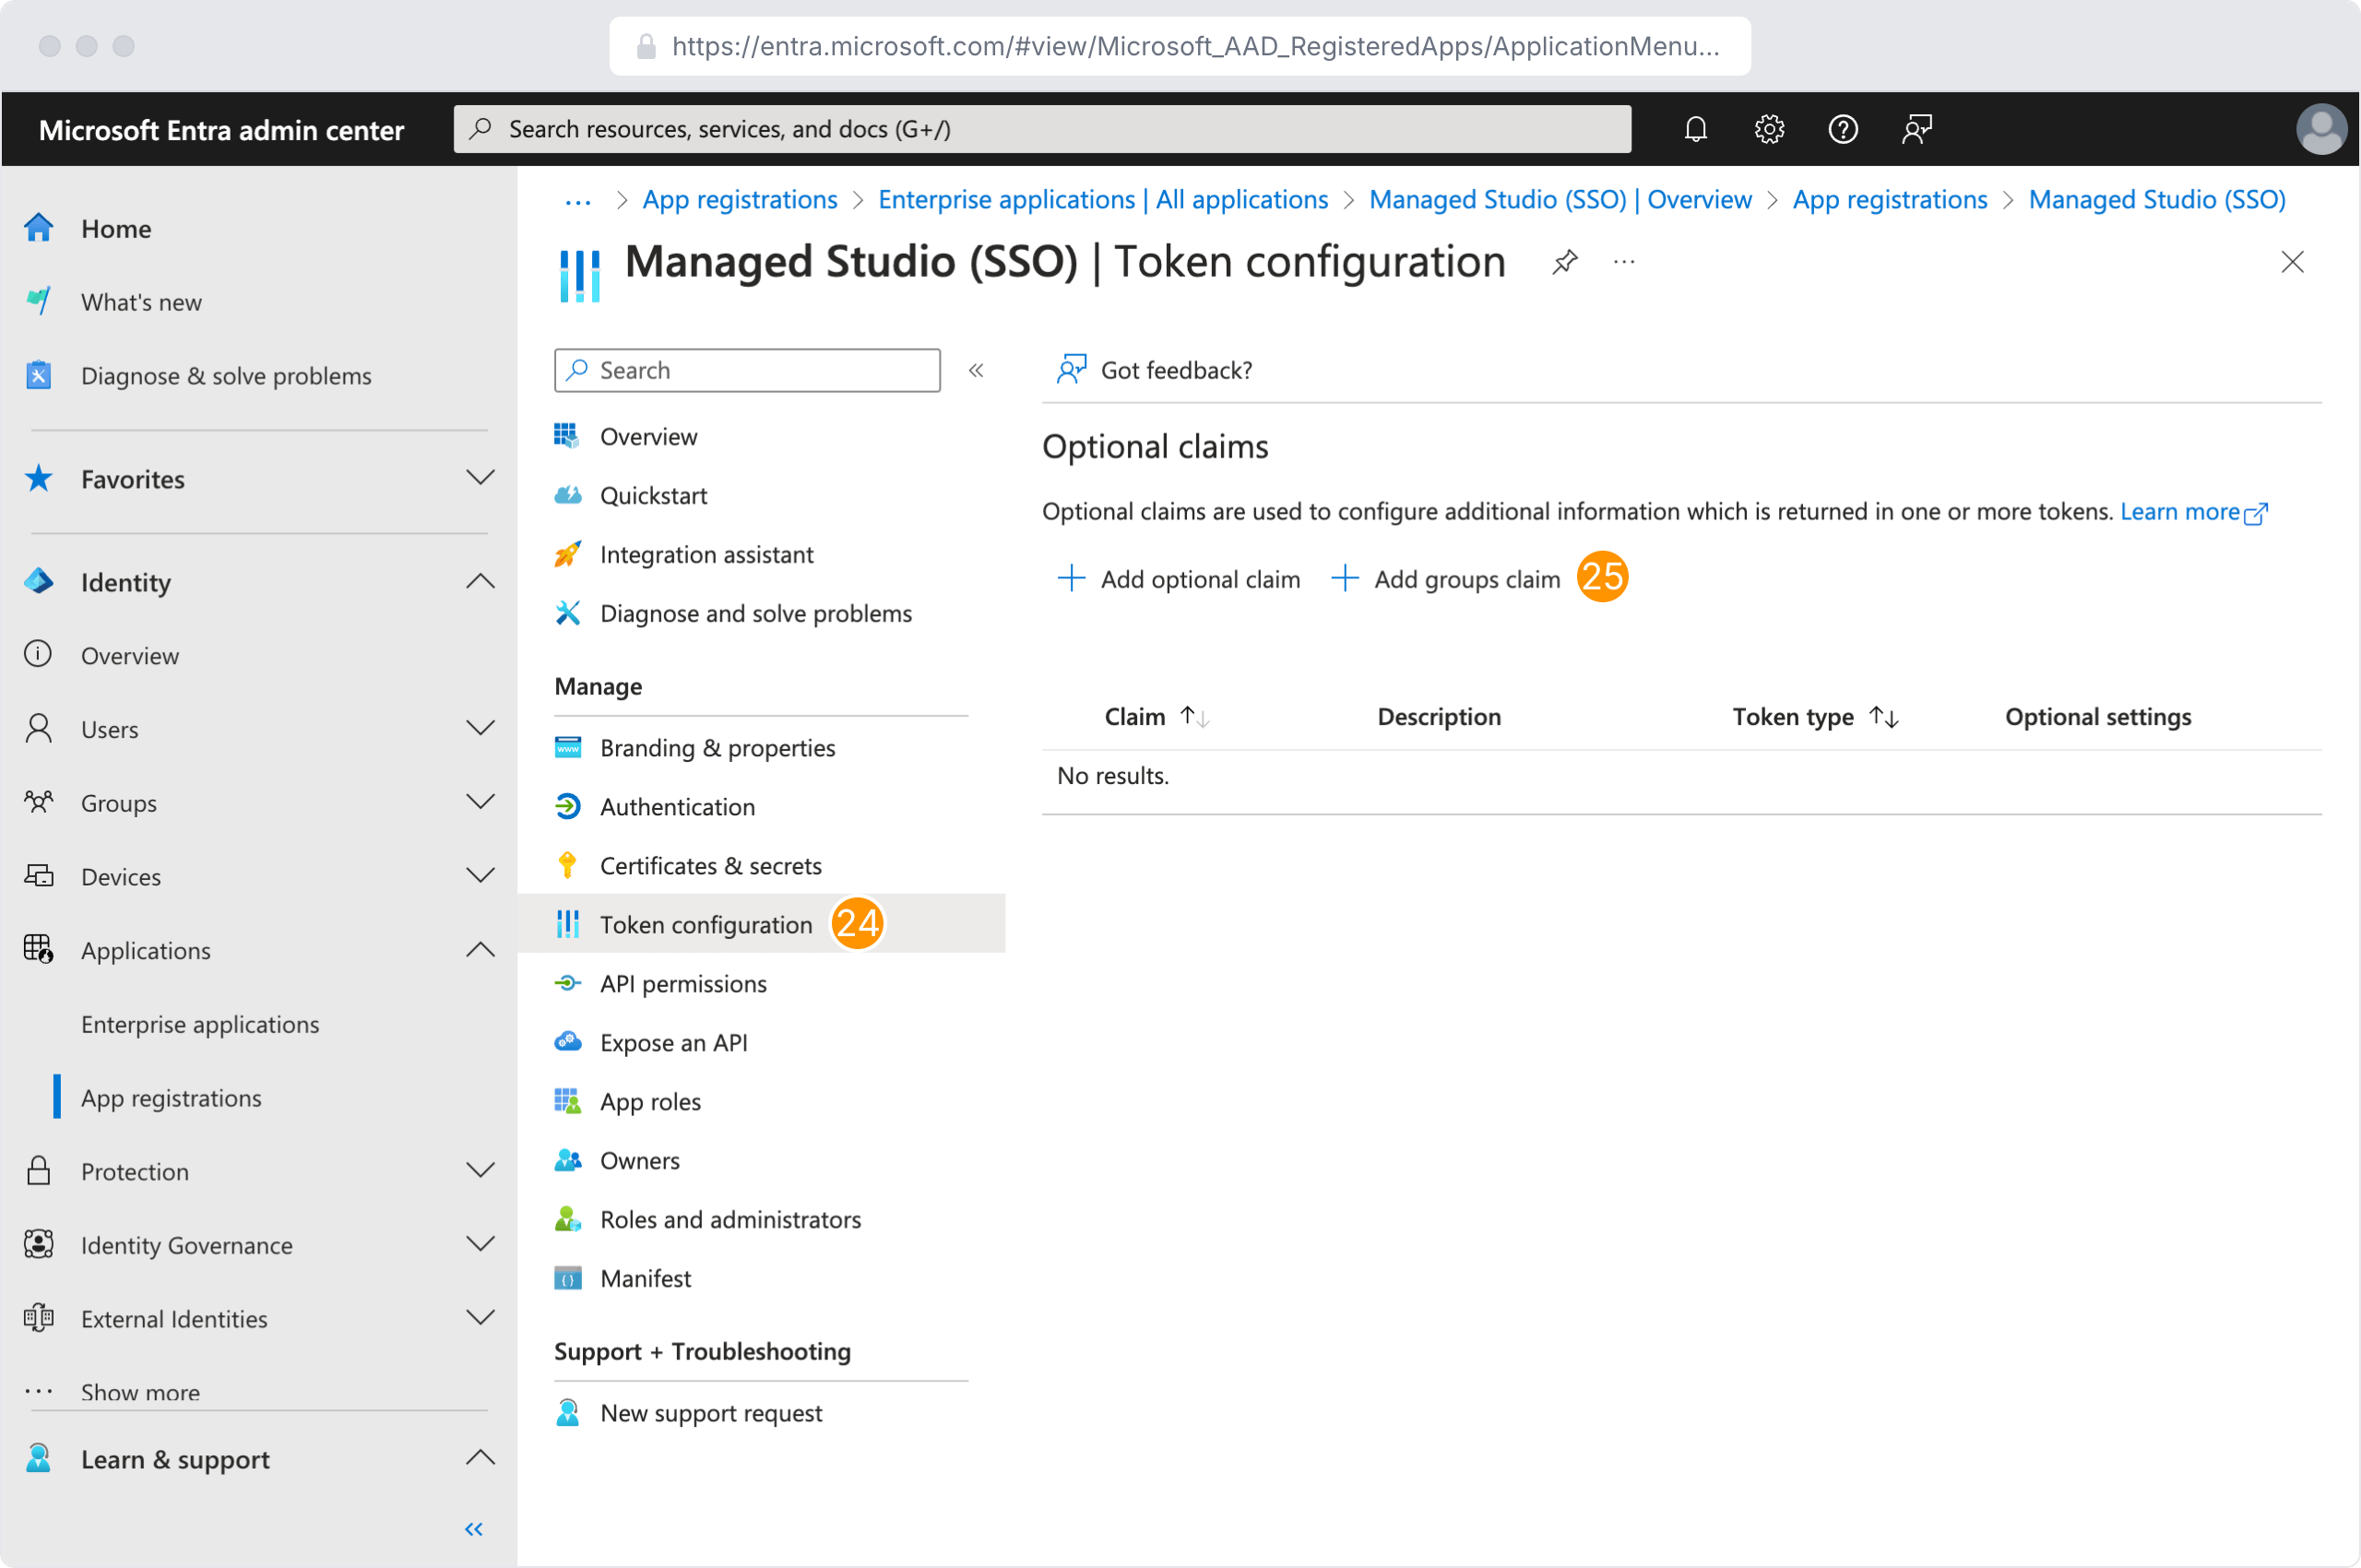
- Navigate to the Token configuration menu item
- Click Add groups claim
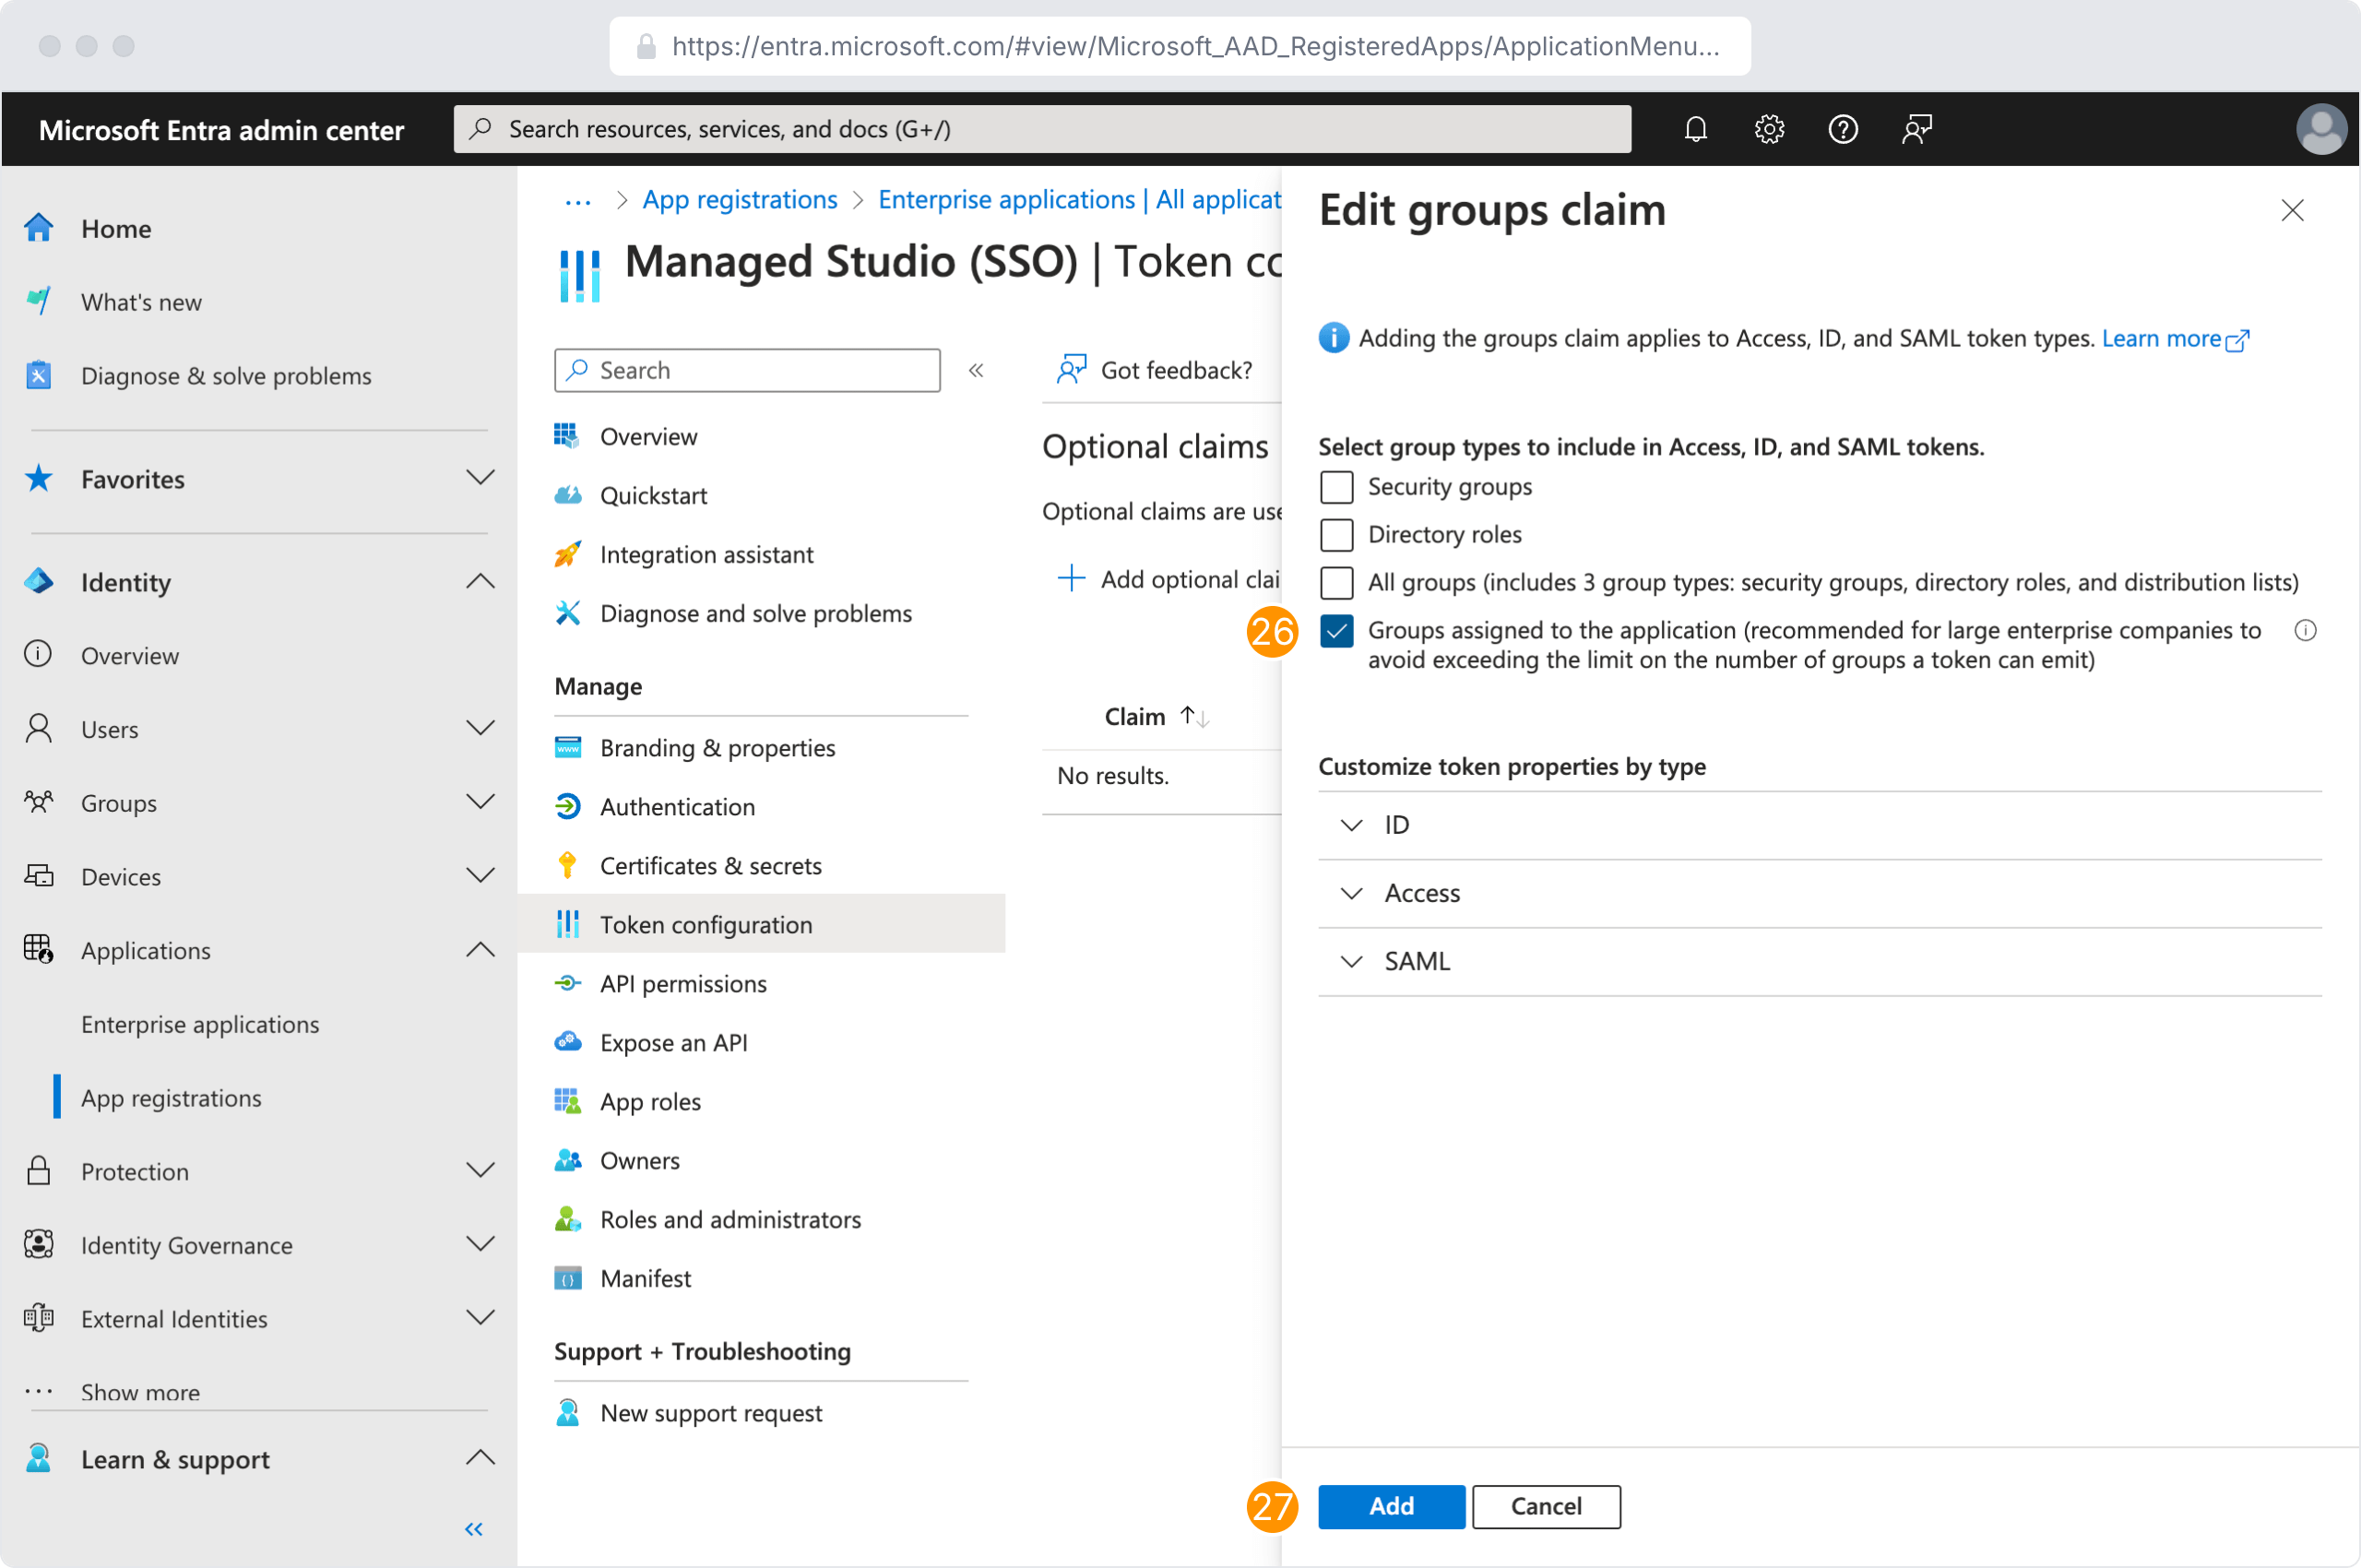
- Select Groups assigned to the application
- Click Add
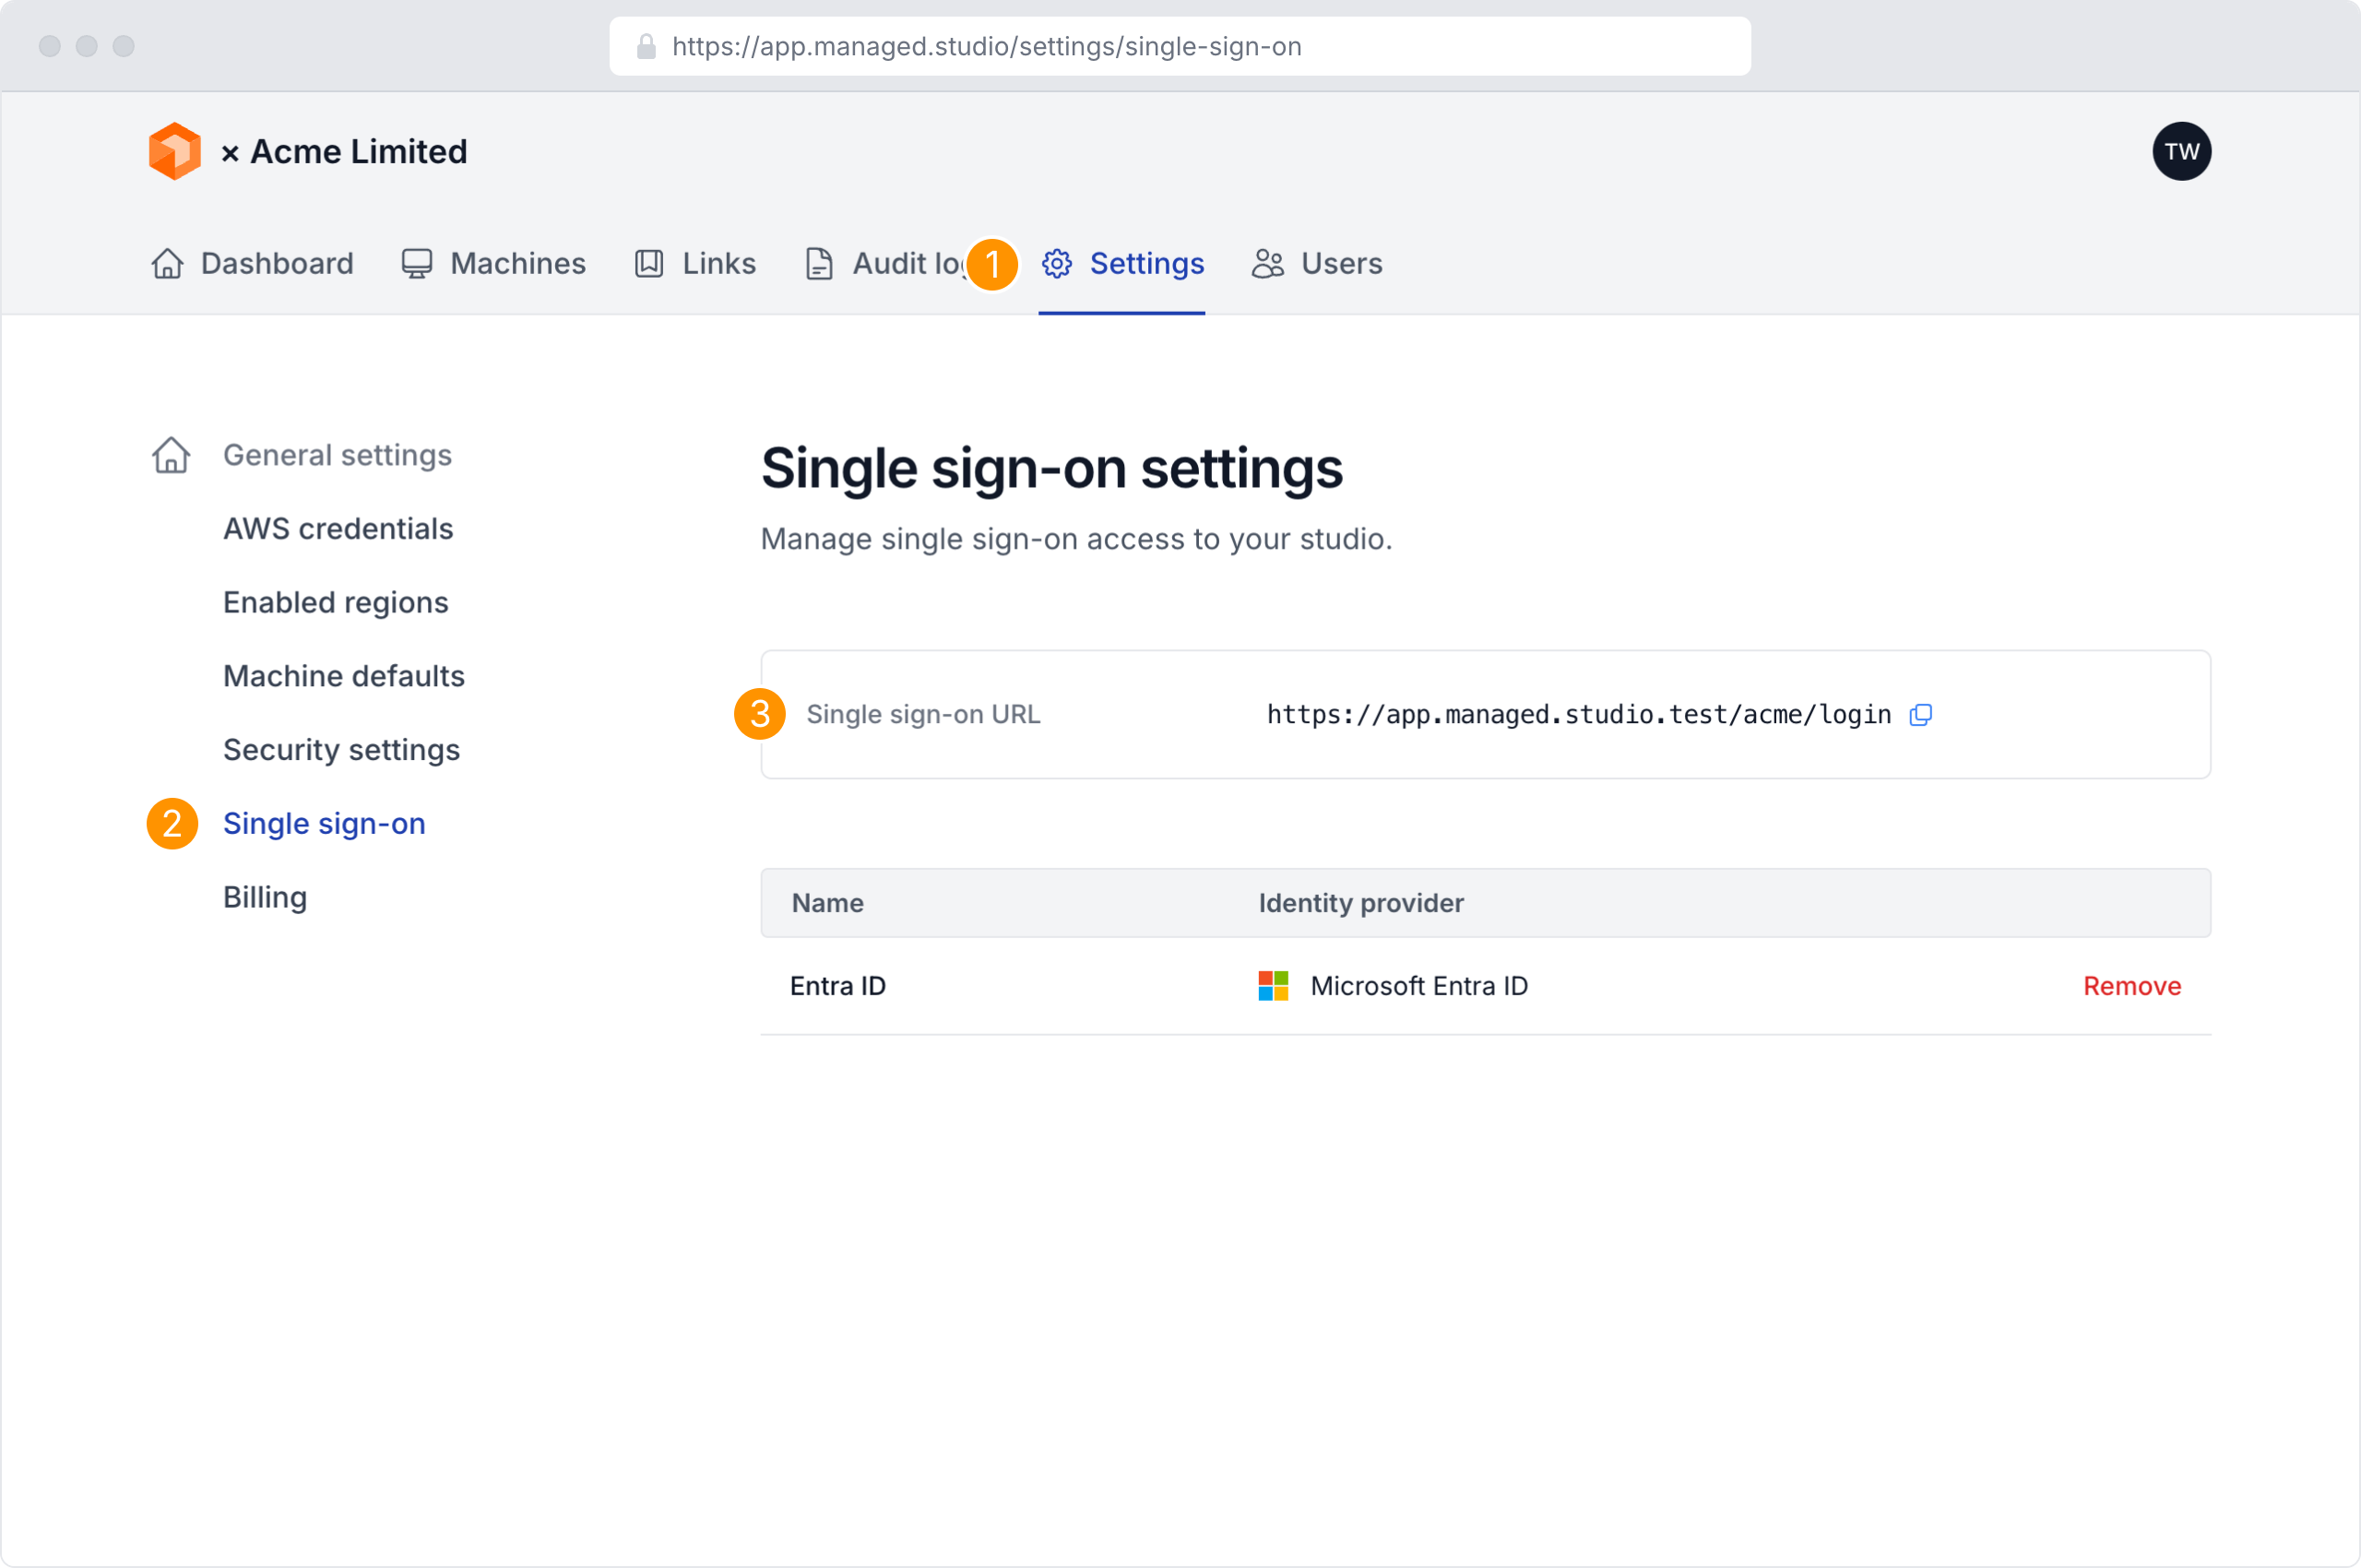
Enabling Single sign-on in Managed Studio
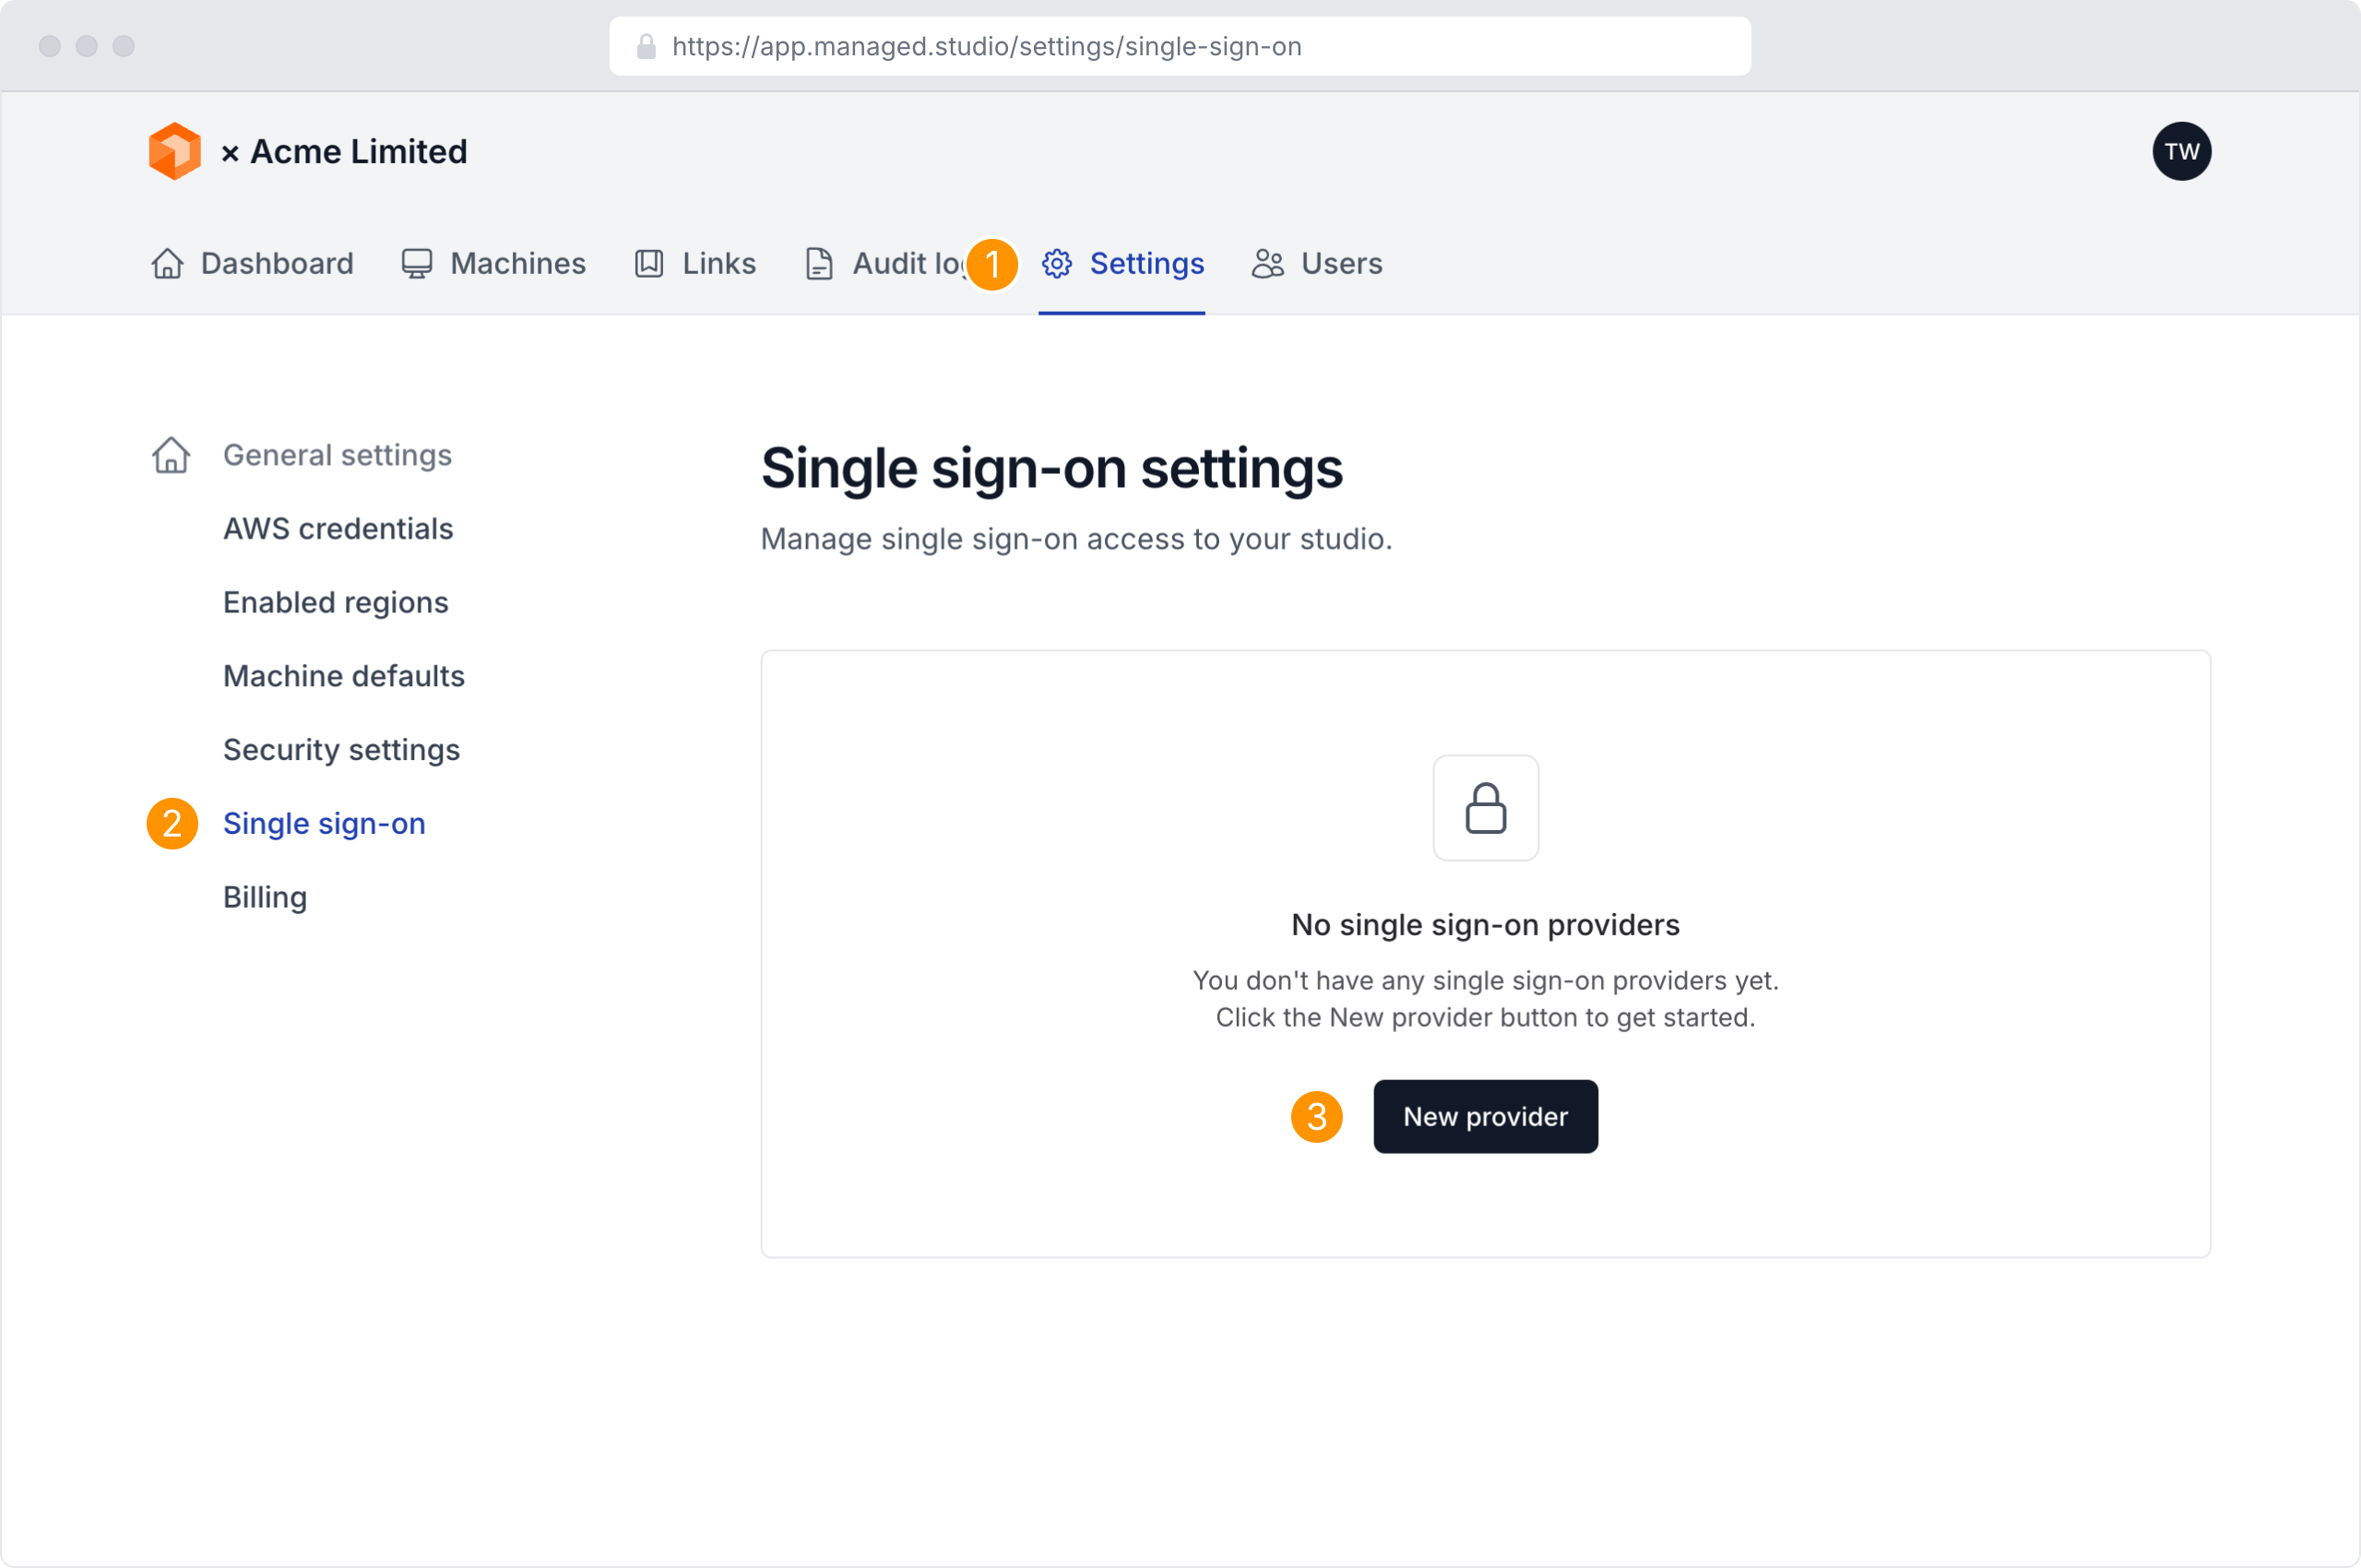
- Navigate to the Settings page
- Click Single sign-on
- Click New provider
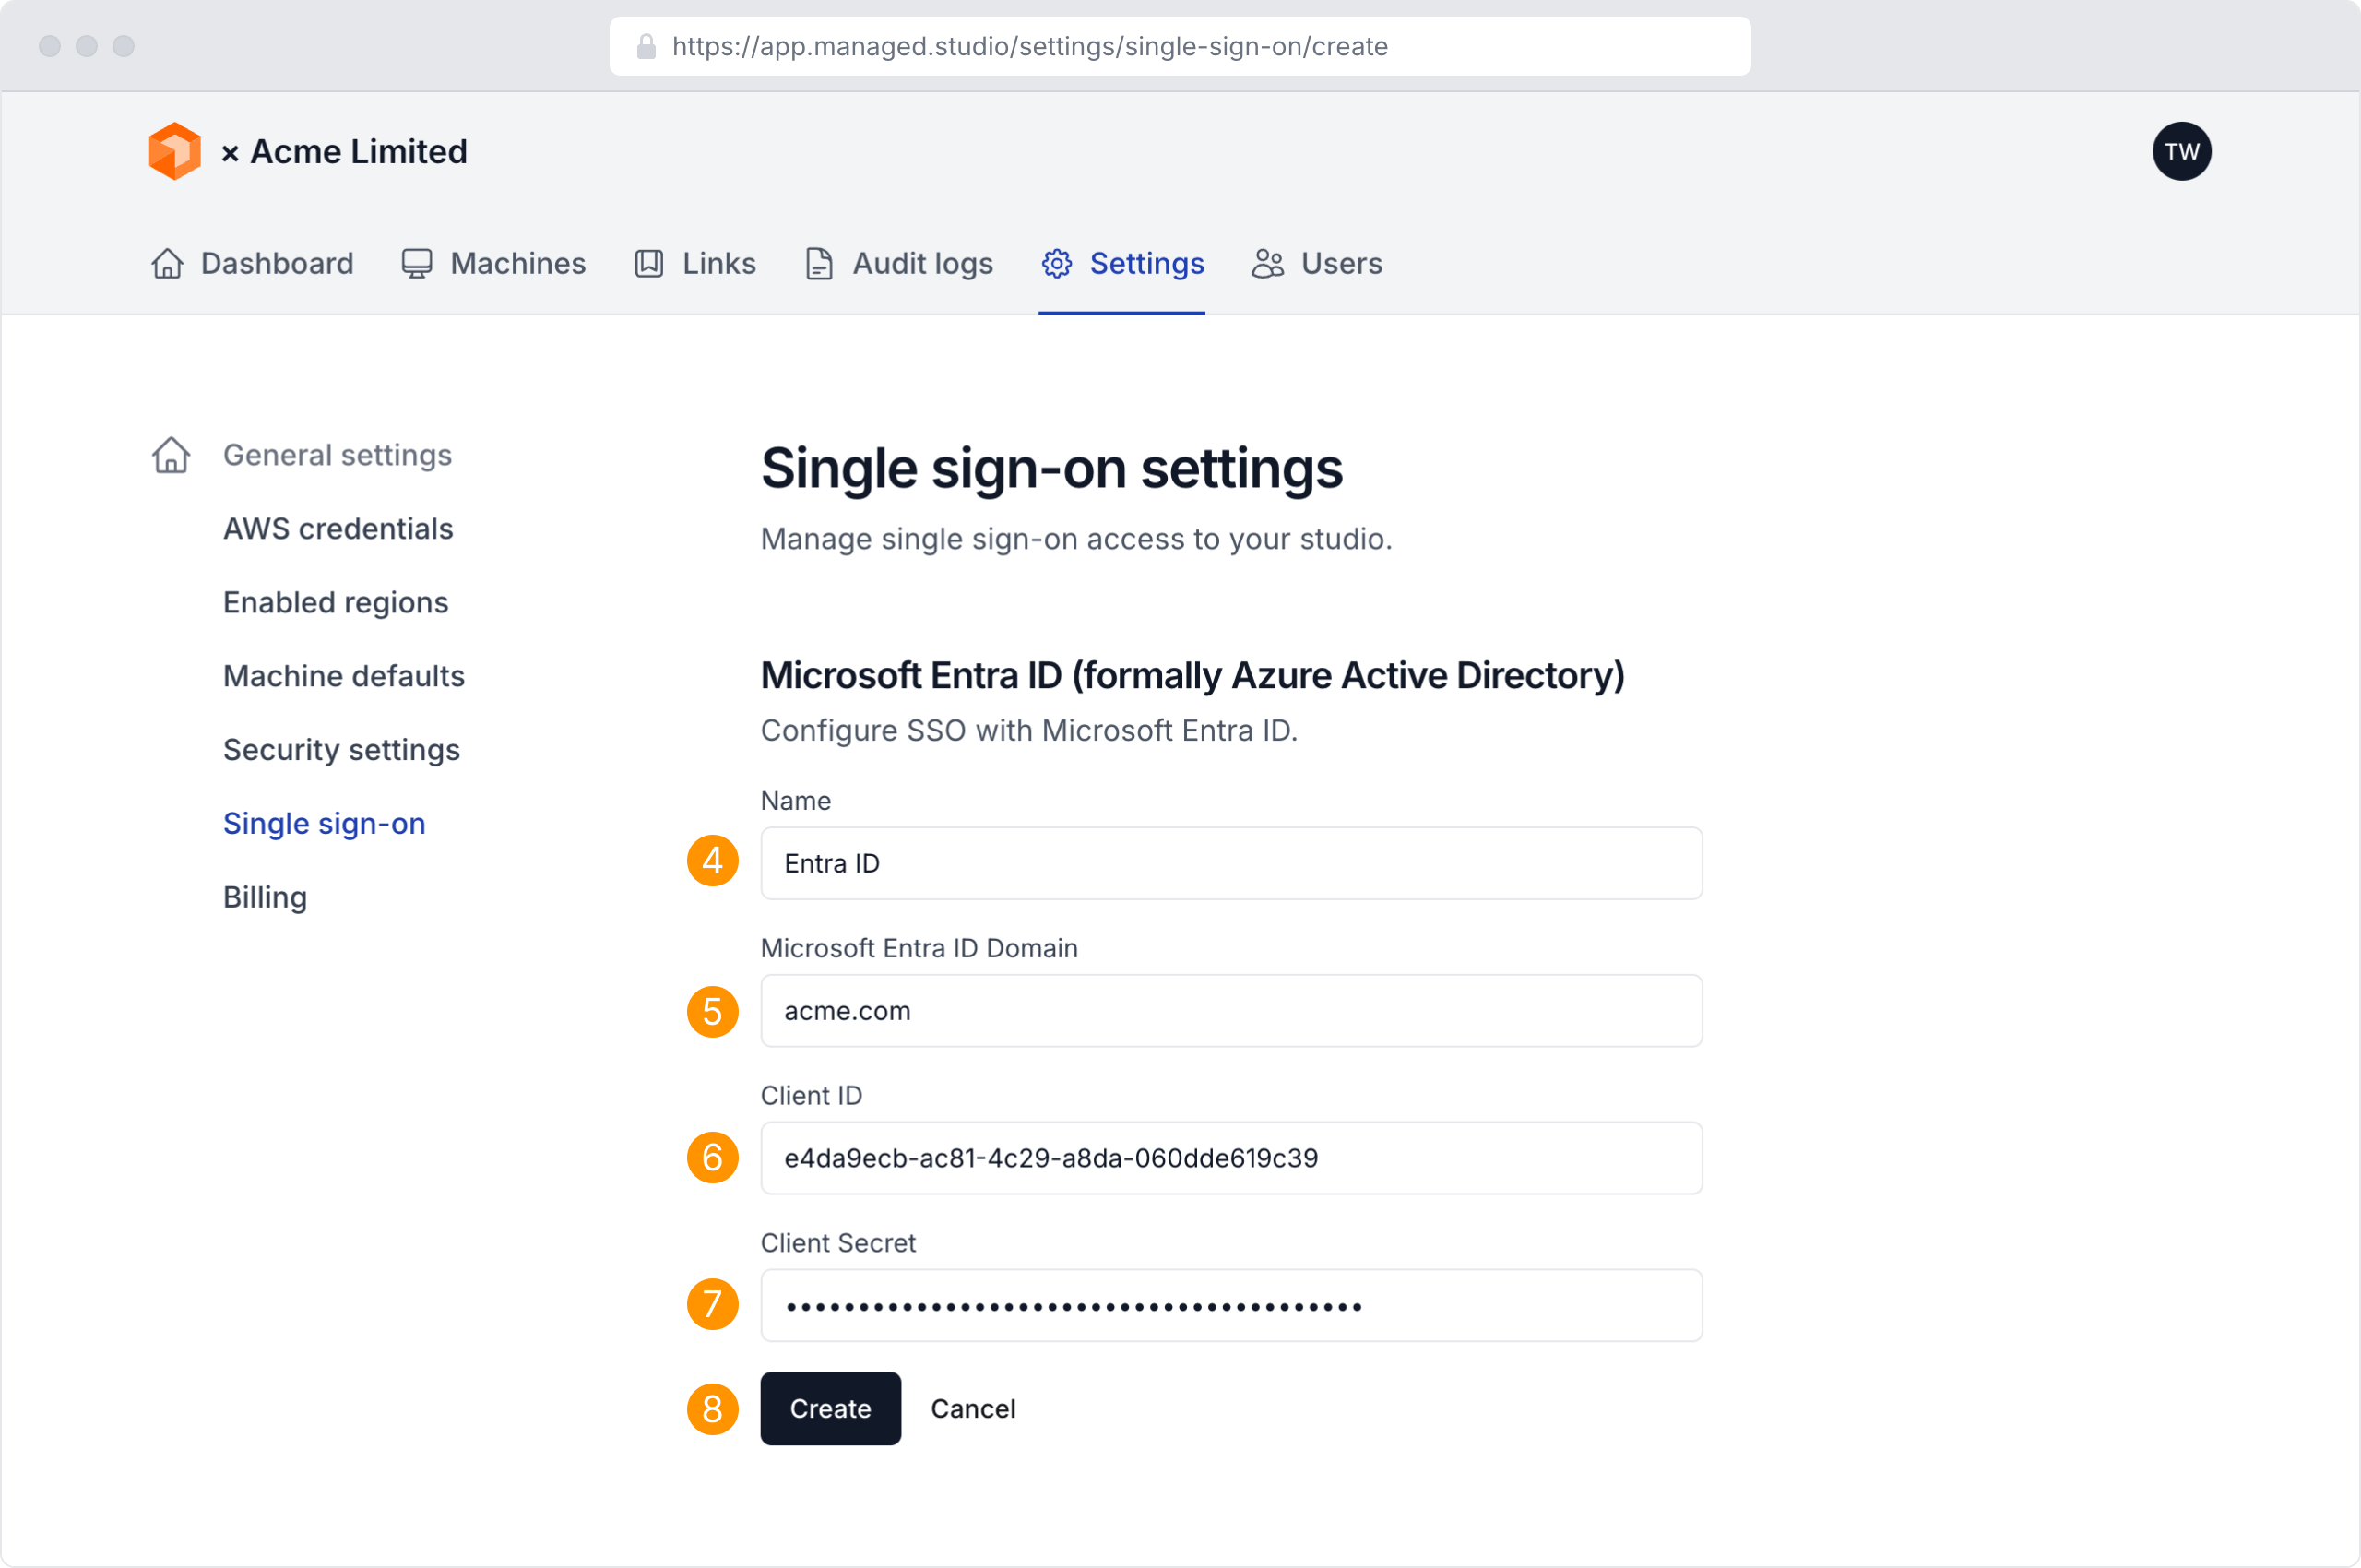
- Customise or use the default Name for the Entra connection (this will be shown on the login page)
- Enter the Entra ID Directory Domain that the application was registered within. Please refer to Microsoft's documentation to locate your directory domain name
- Enter the Client ID you previously copied from the Entra admin center
- Enter the Client Secret you previously copied from the Entra admin center
- Click Create
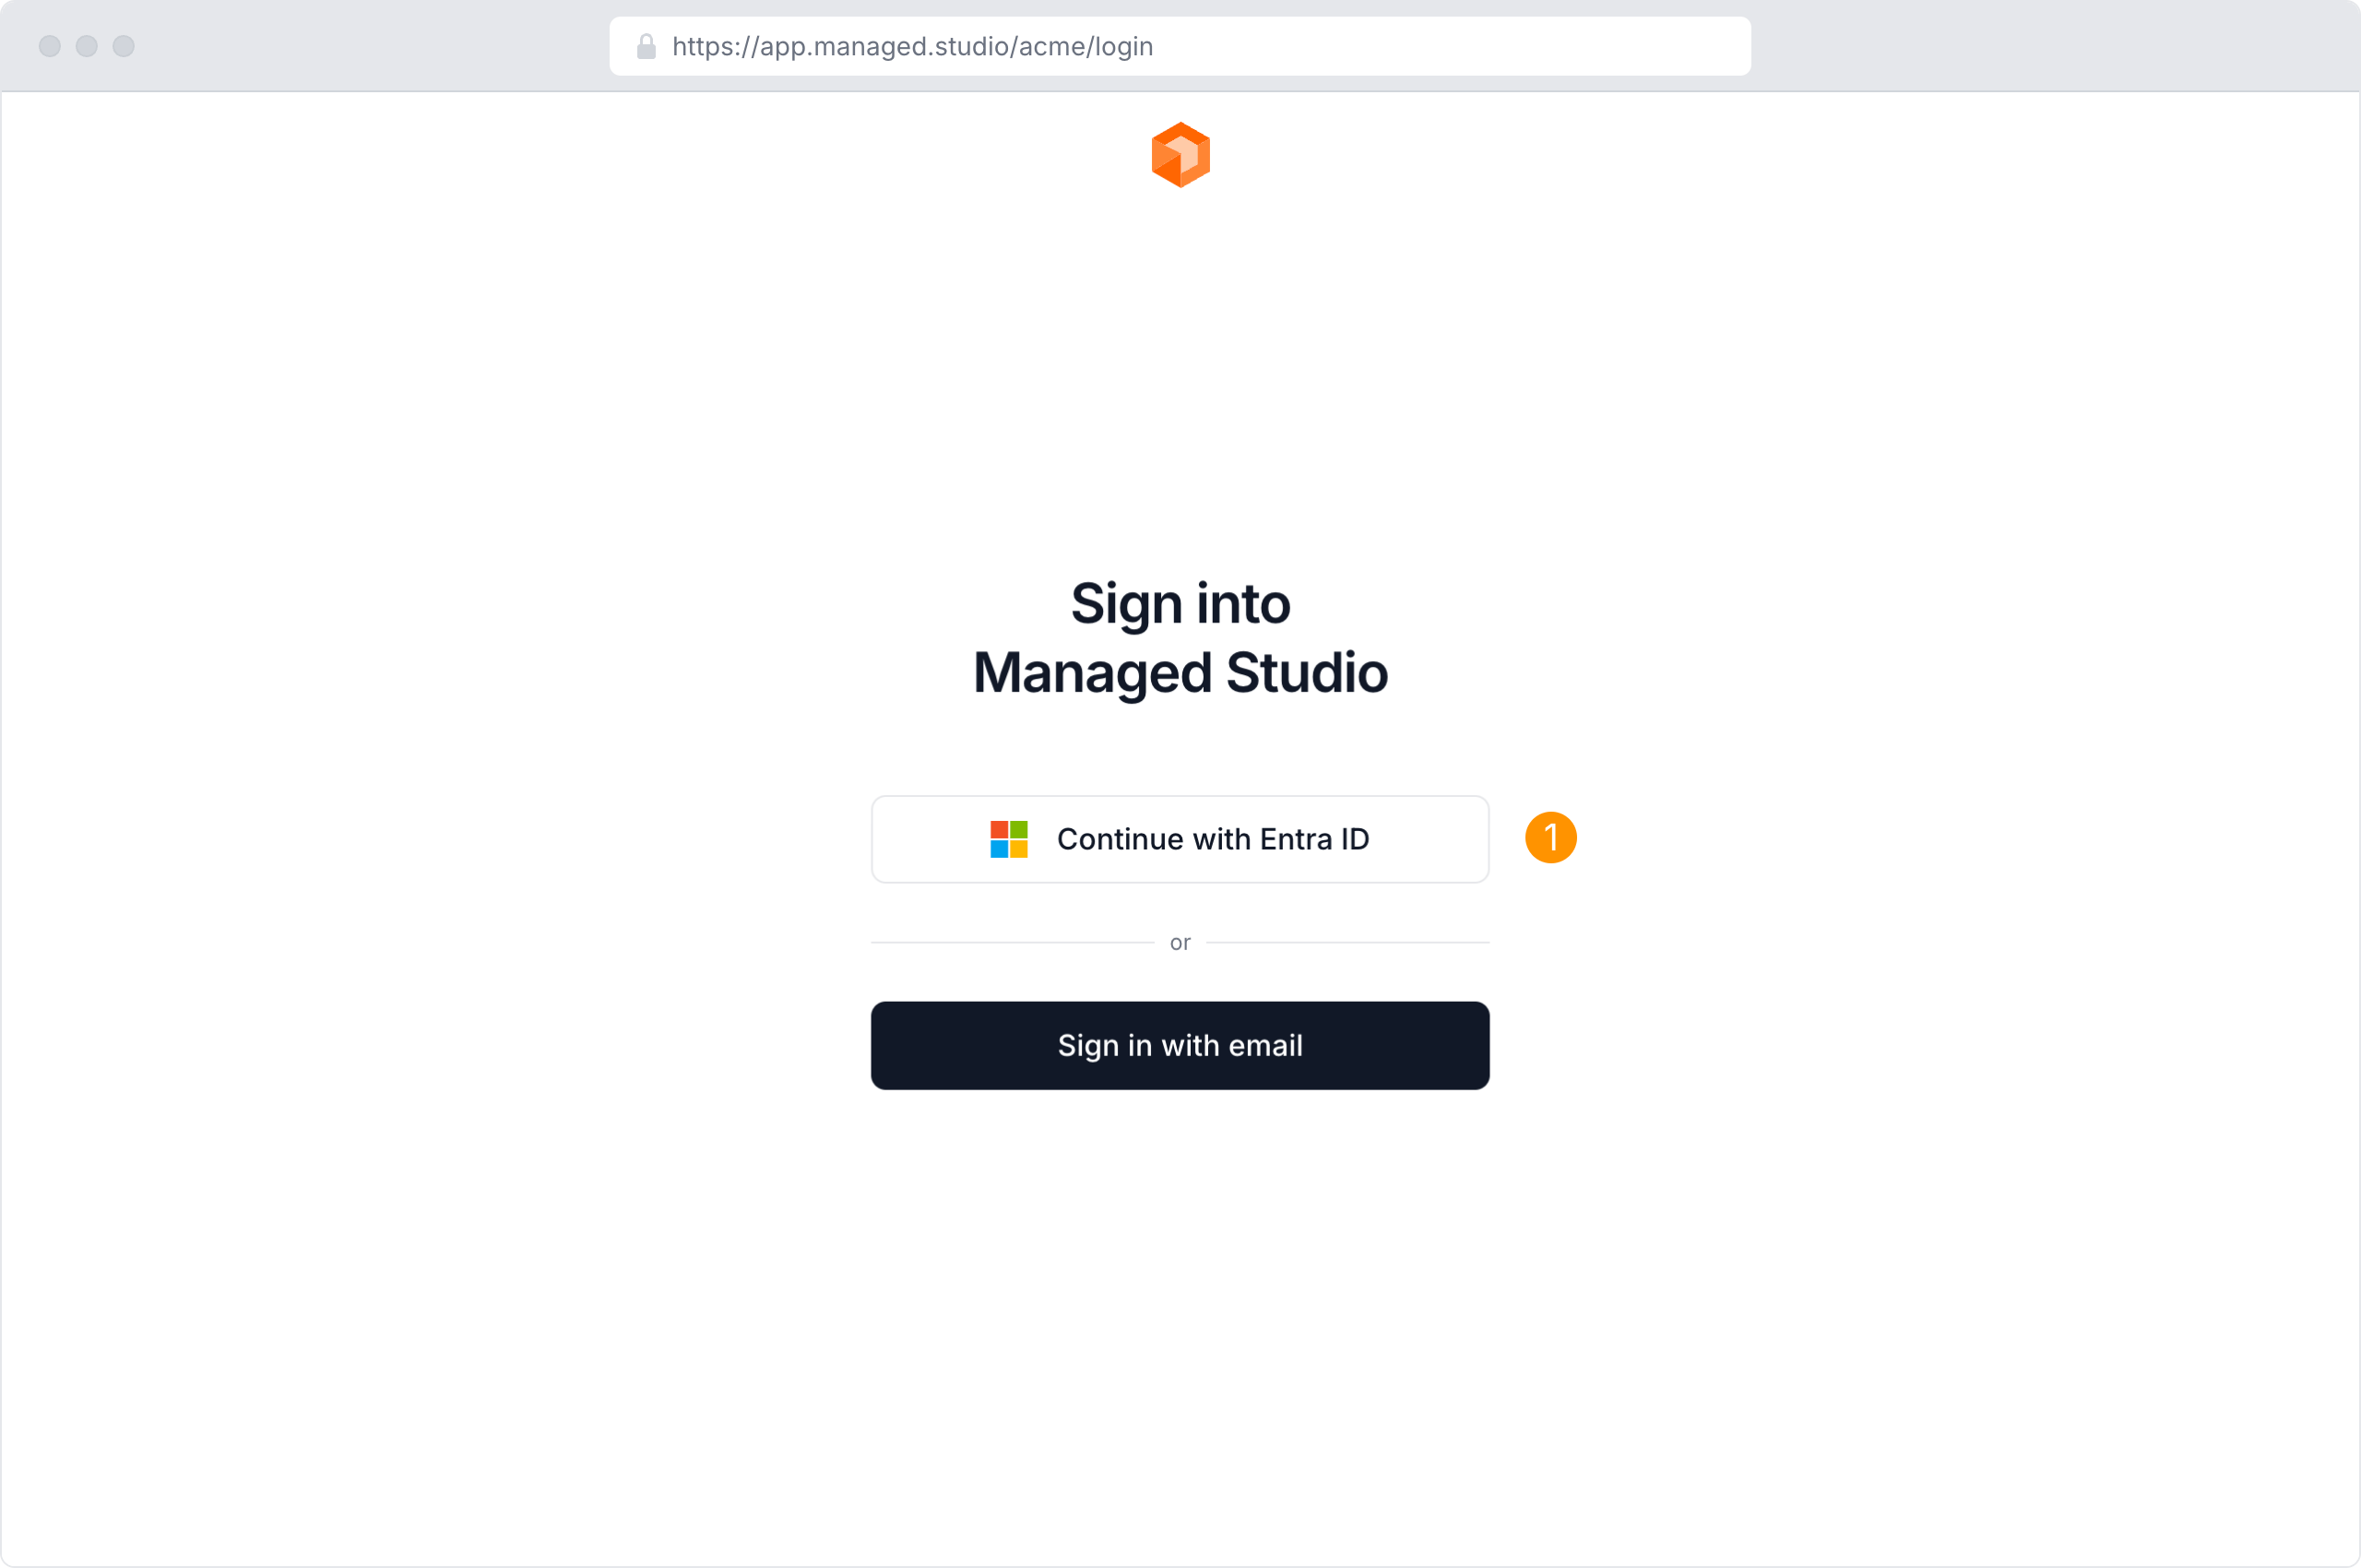
Signing in with Single sign-on
- Navigate to your dedicated login page and click the Continue with Entra ID button
Finding your Single sign-on URL
- Navigate to the Settings page
- Click Single sign-on
- Your Single sign-on URL is show at the top of the page
Accepting invitations with Single sign-on
- When accepting an invitation, click the Continue with Entra ID button
